WEEK 6
Lamps part 2 and Molding & Casting part 1!
In this assignment, I created a parametric lamp using on Grasshopper that outputs a lamp where holes represent the sequence of prime numbers and started working on my molding and casting design for next week's assignment. You can get my .3dm files here.
Task 1: Lamps The Sequel
1. The Final Idea
With many potential ideas from the previous week and none of them being easy, I decided to simply test them out in grasshopper.
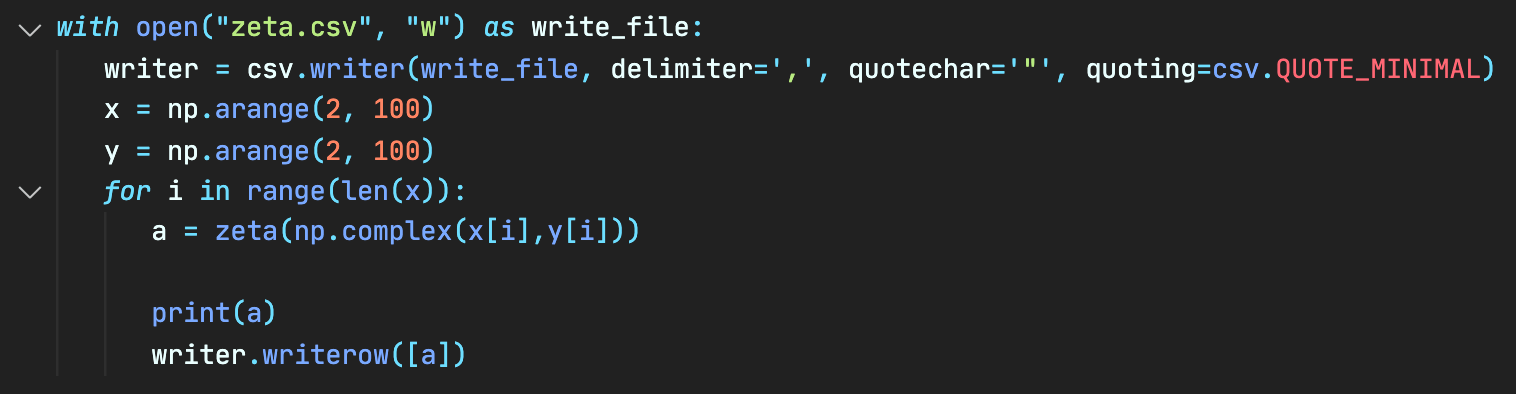
I started tackling the Riemann Zeta function by writing a script that is then outputted into a csv file. But without a deep understand in how the function truly works, it was very hard to actually to play with the function in such a way that outputs a 3-Dimensional shape.
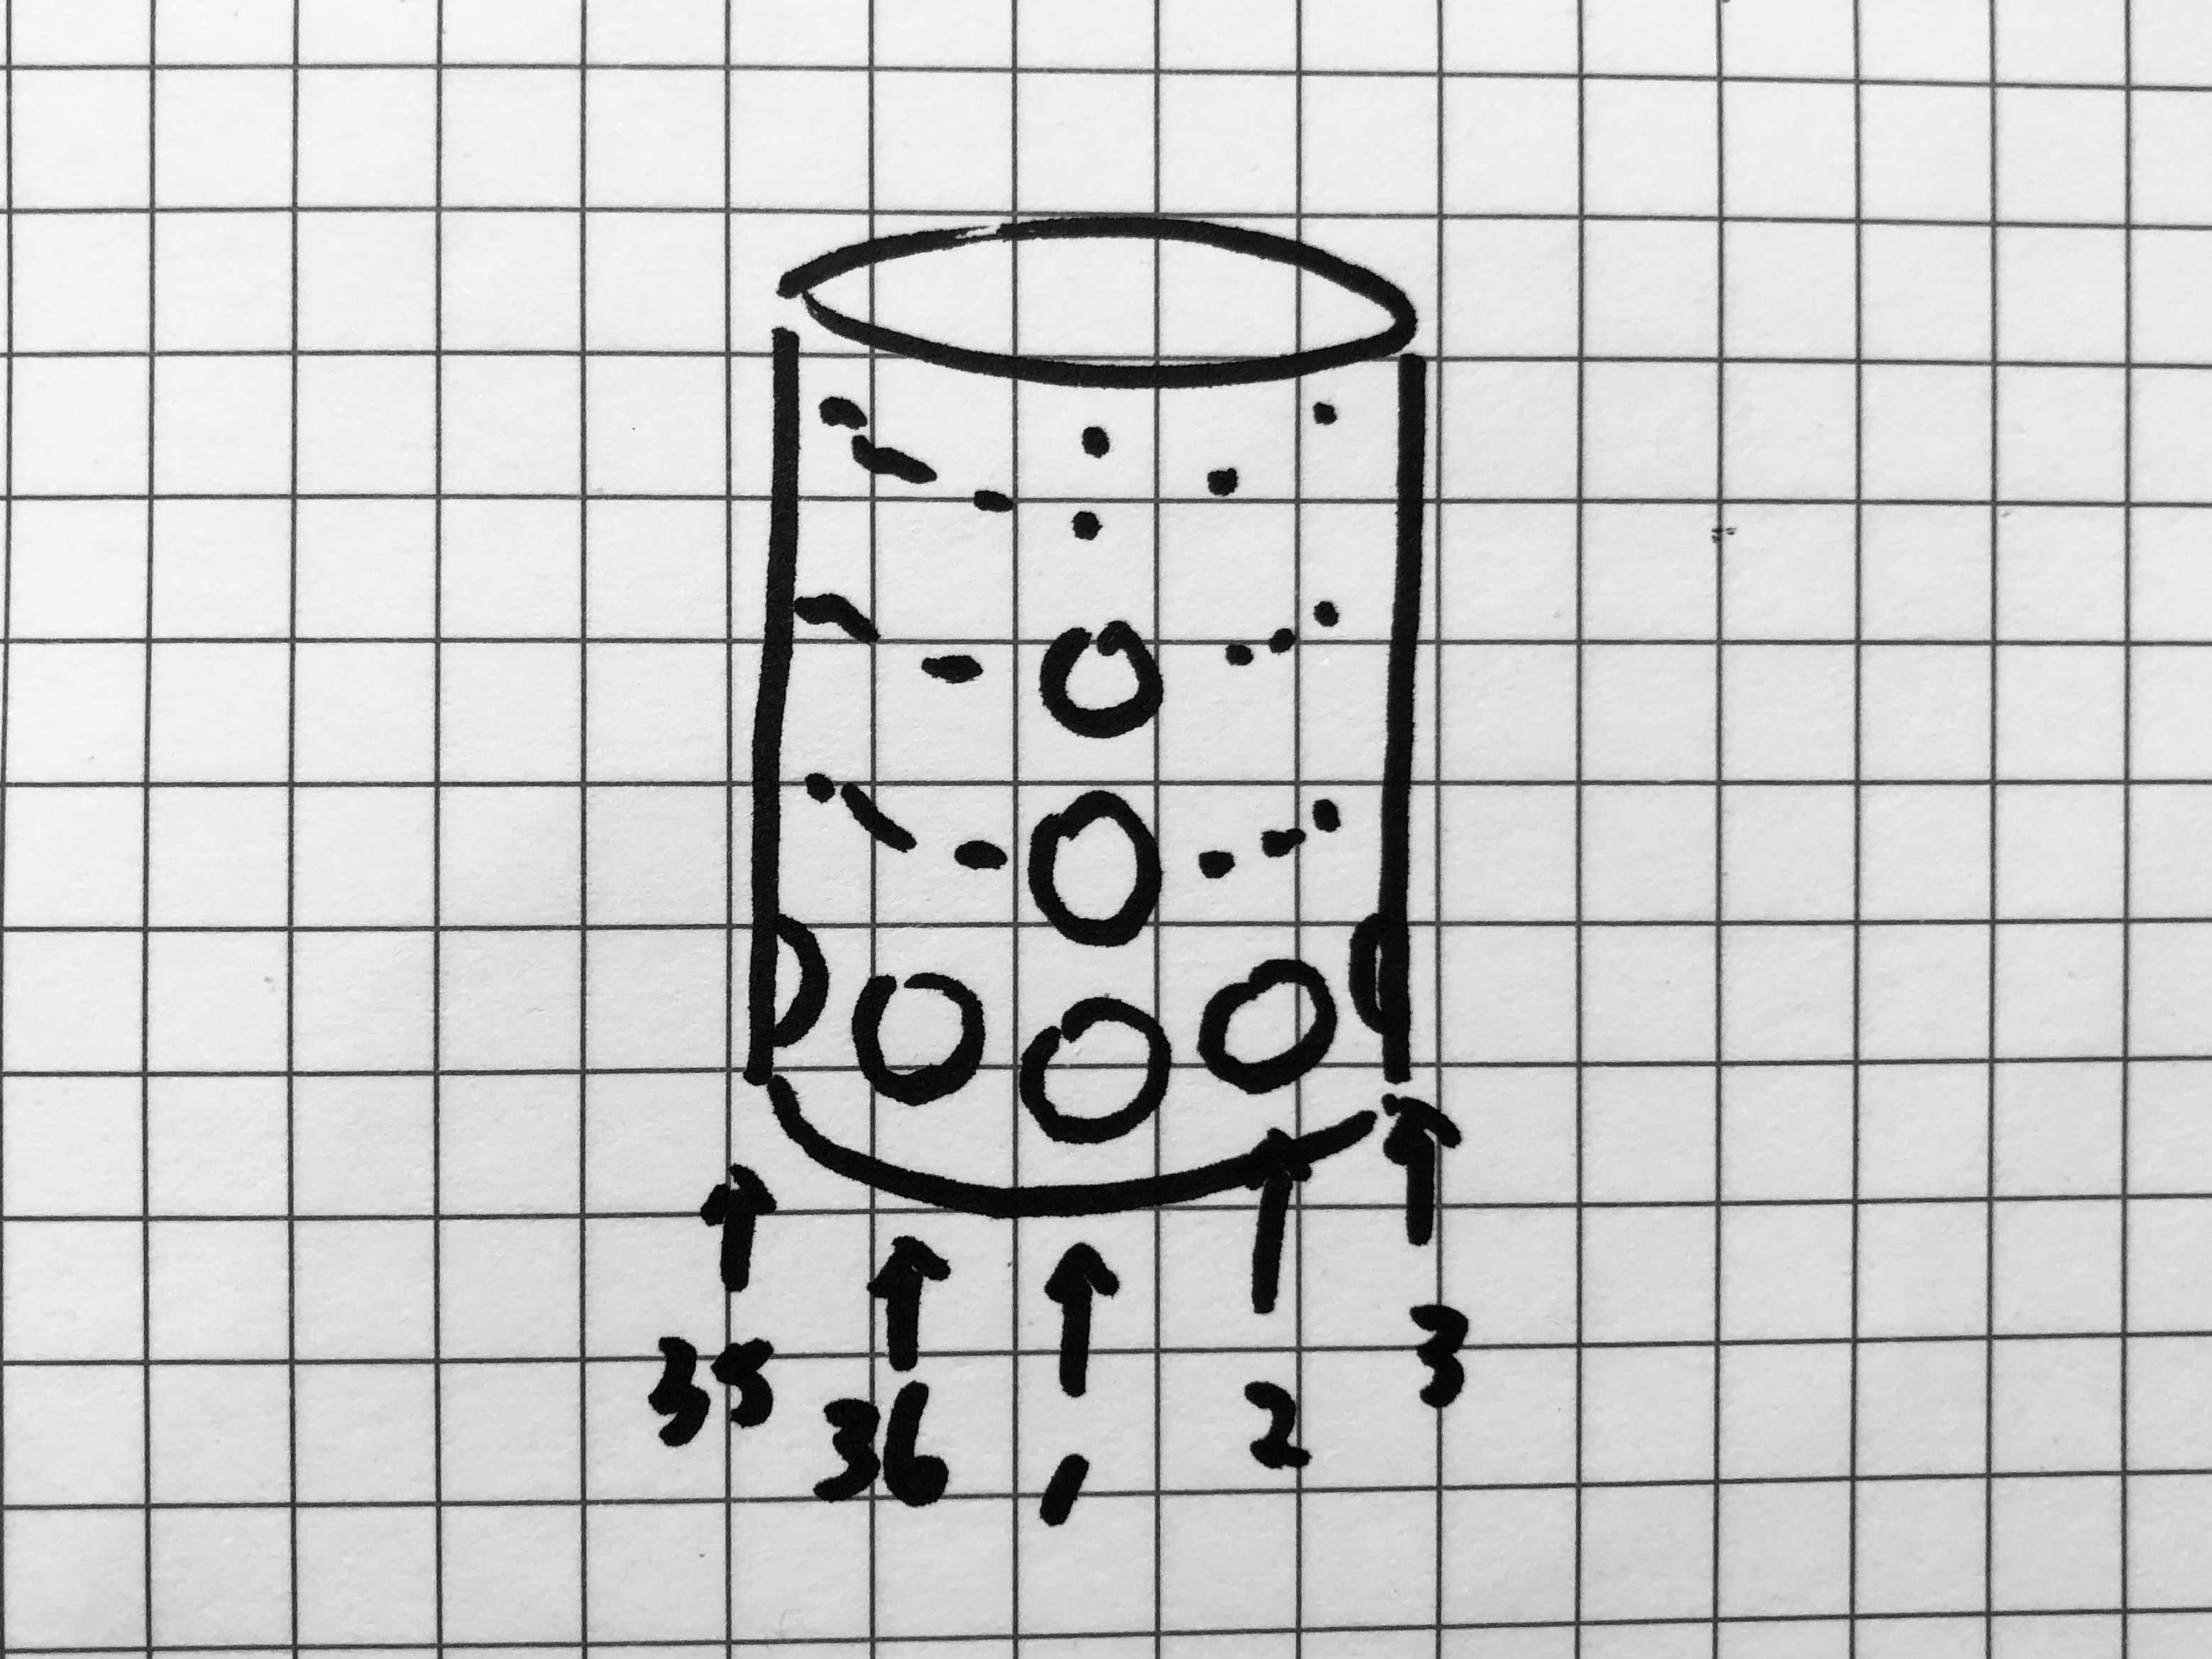
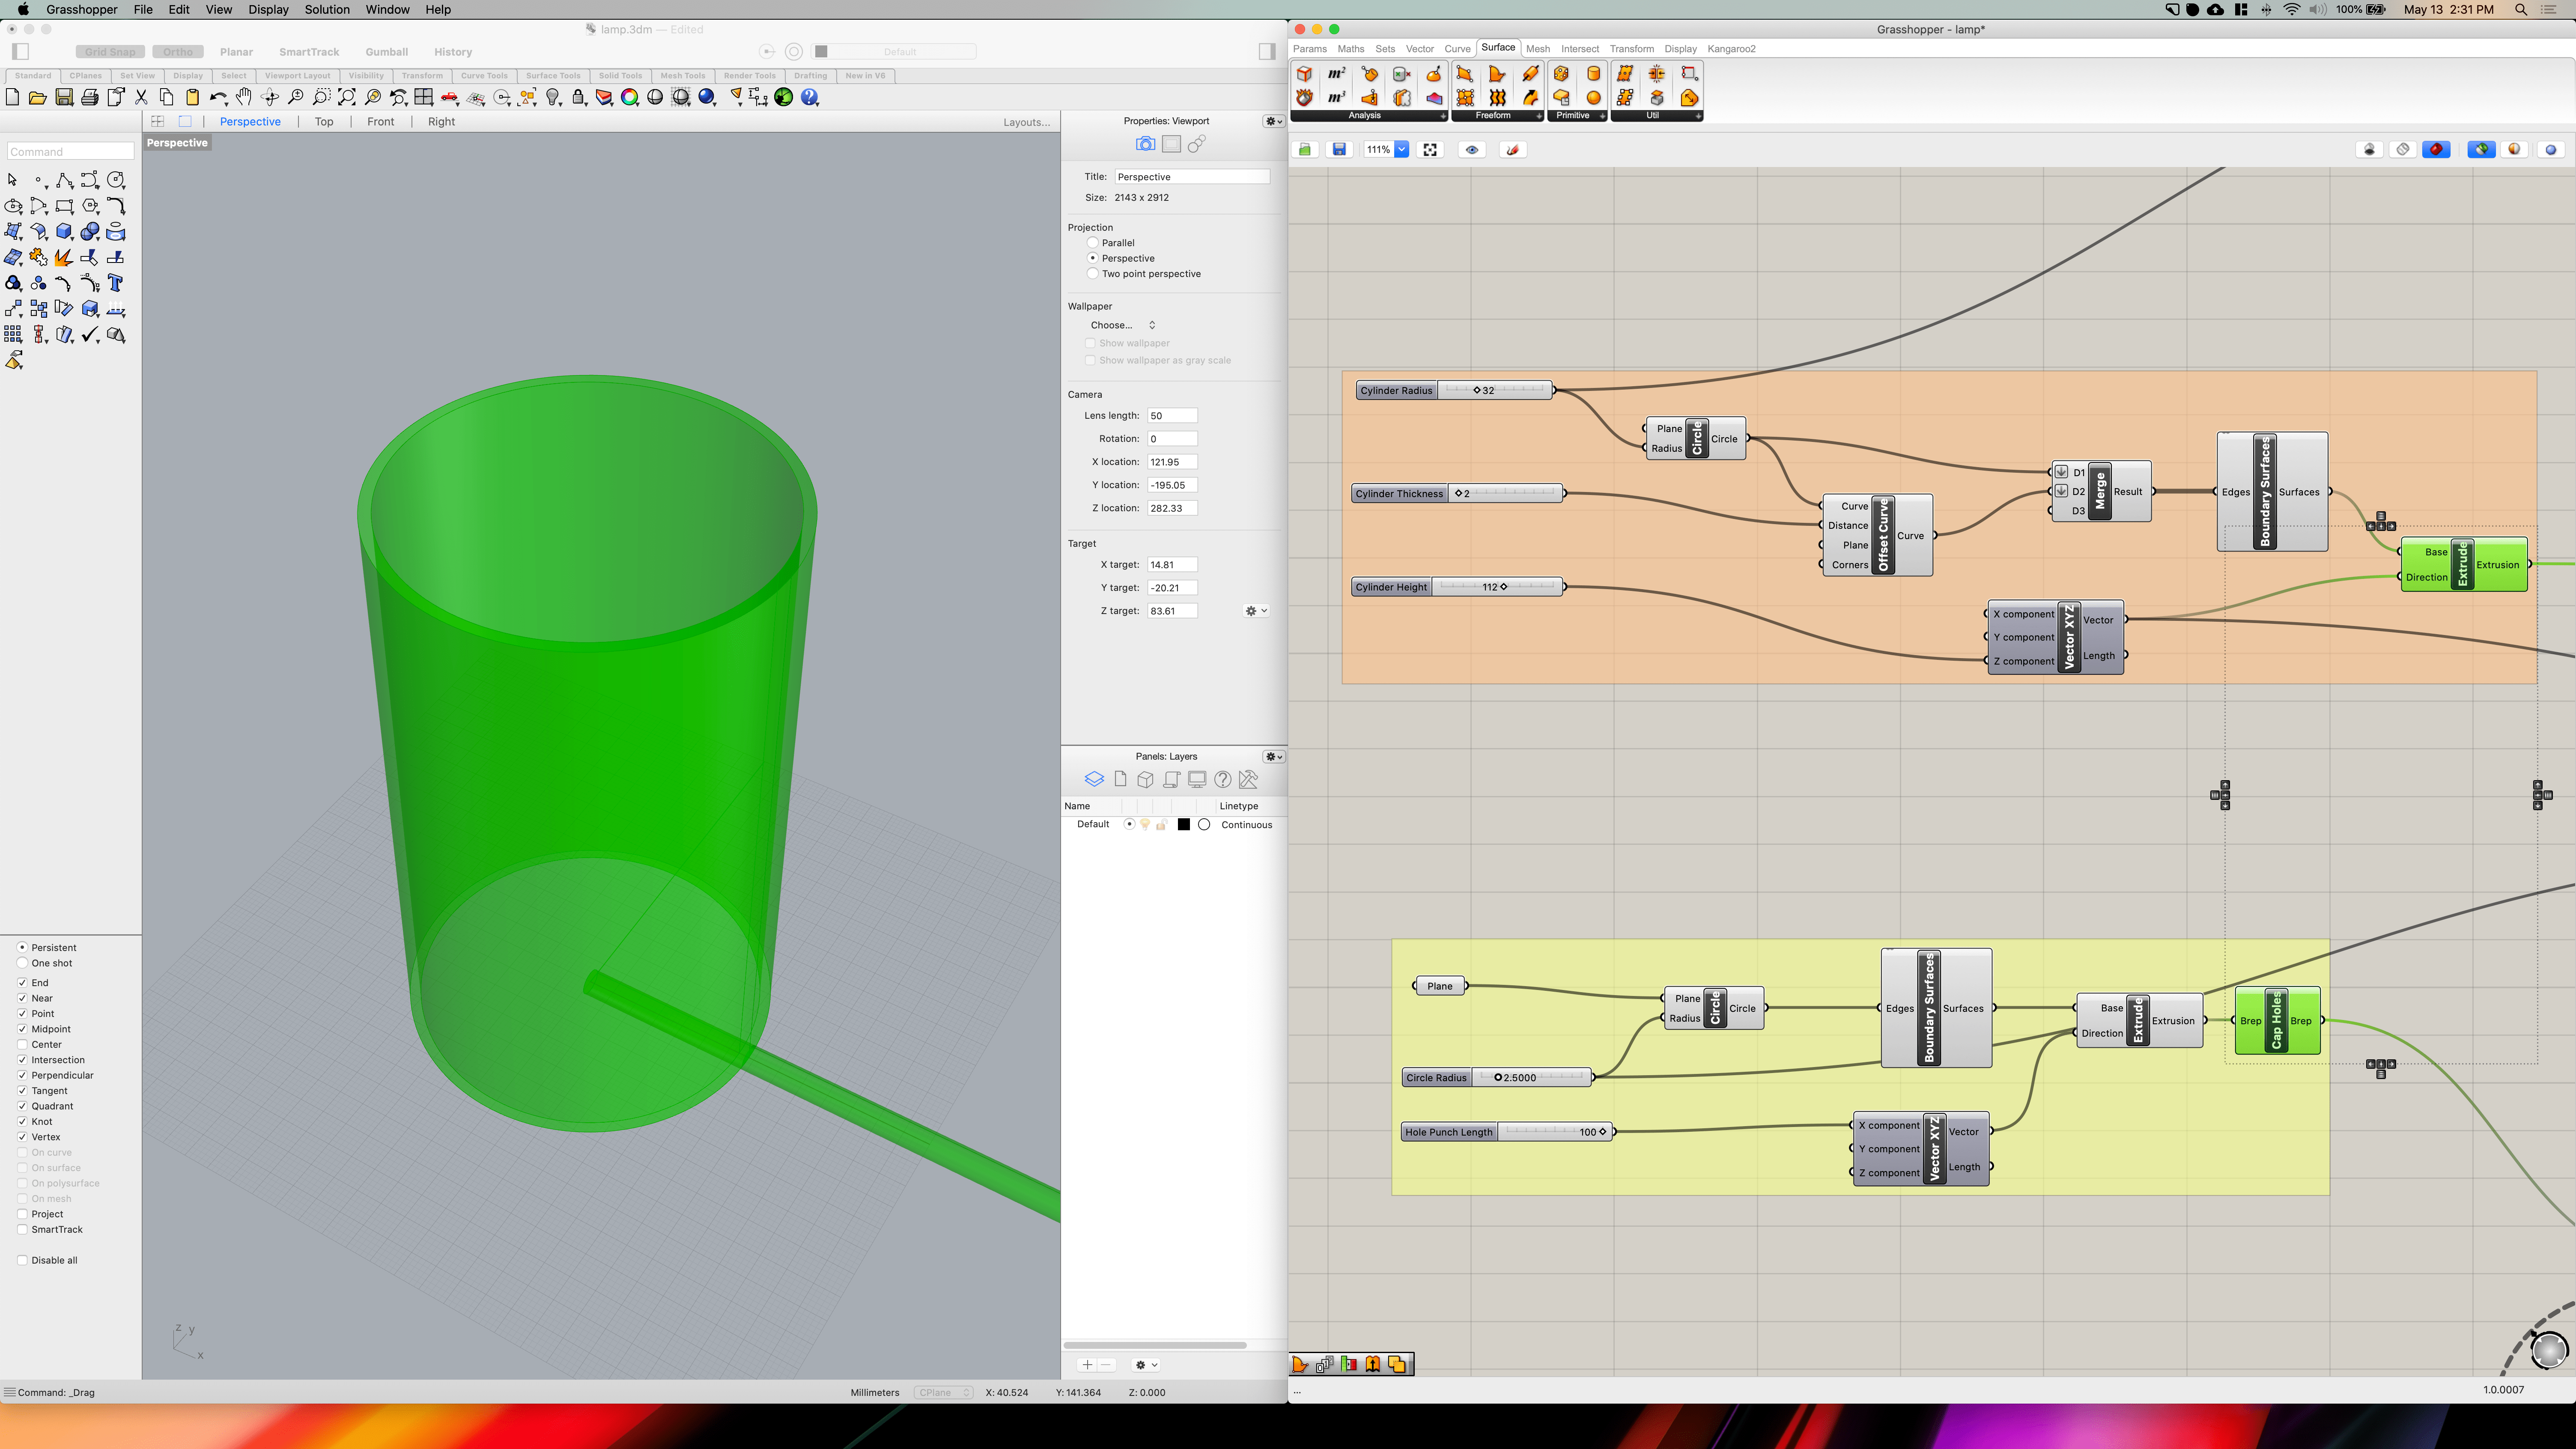
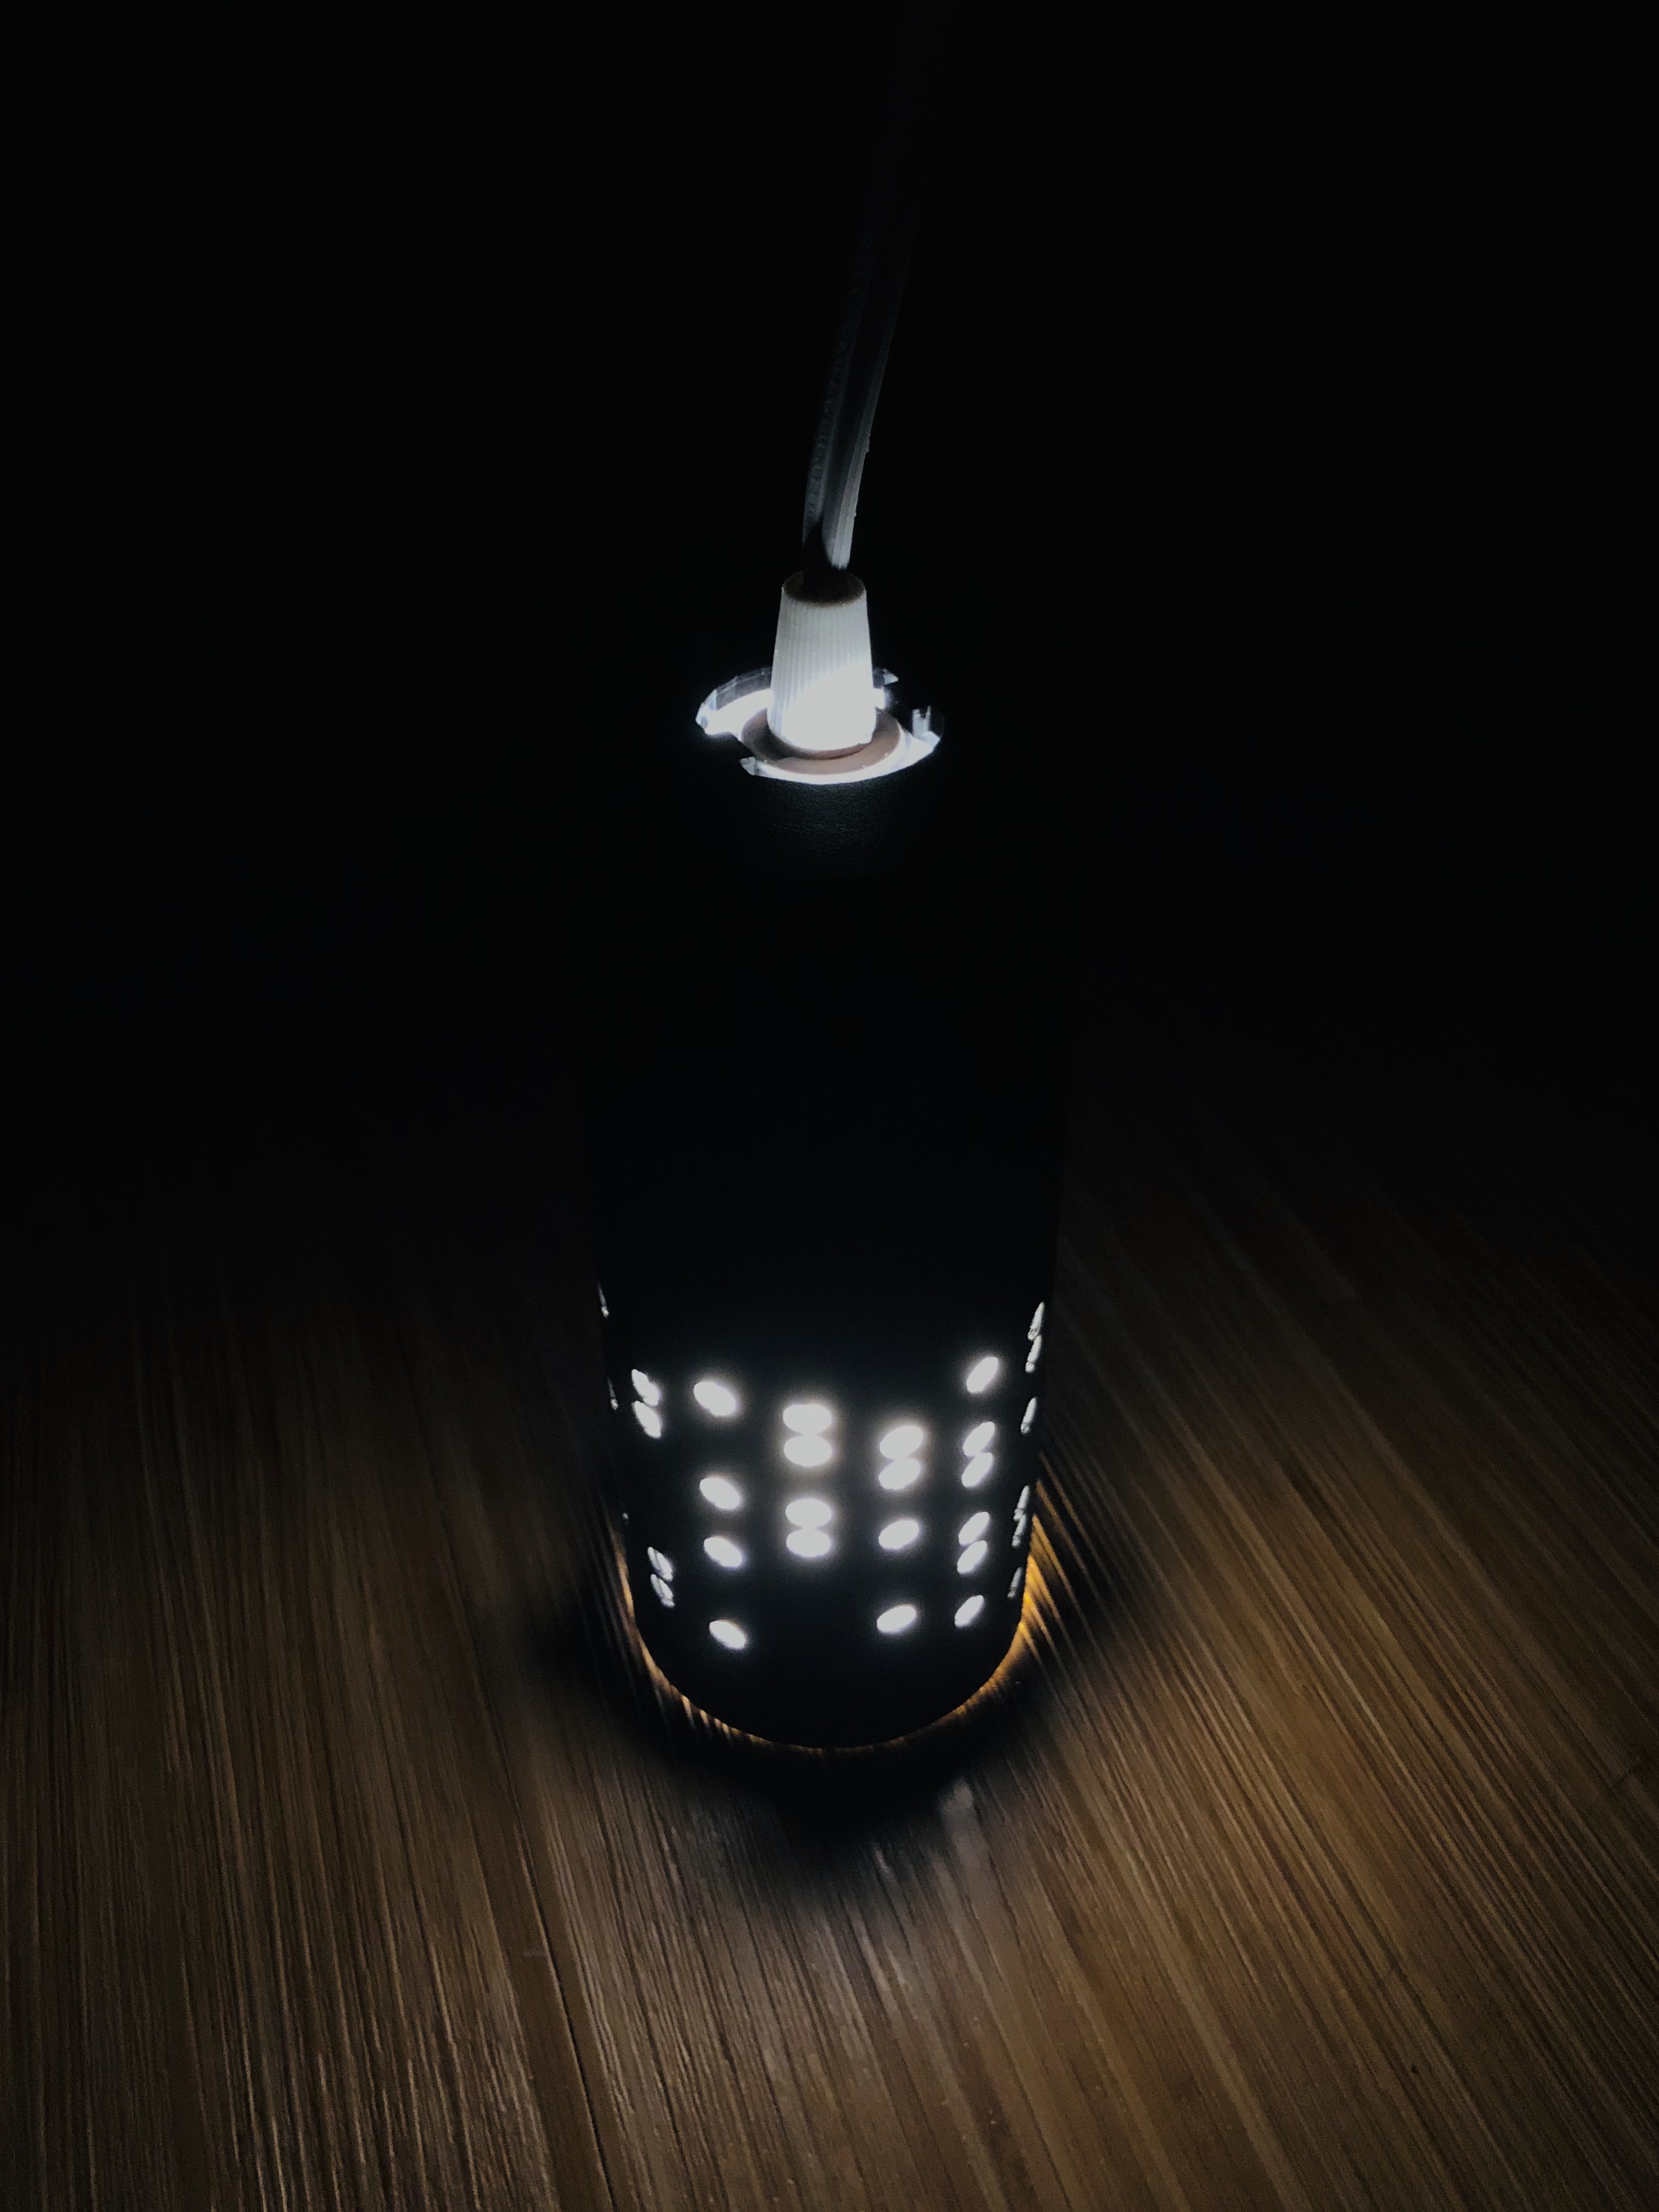
Moving onto the prime number idea, I realized it was hard to map the spiral patterns onto a small cylindrical shape, hence I decided to limit the idea into mapping prime numbers to a set number of angles in a row and a set number of rows in a cylinder. If an angle within a row is a prime number, we then puncture the cylinder with a hole.
2. Using GHPython
After implementing the basic shapes in Grasshopper including the main cylindrical lamp shade and thin cylinder poles that are used to create holes on the lamp shade (through BooleanDifference).
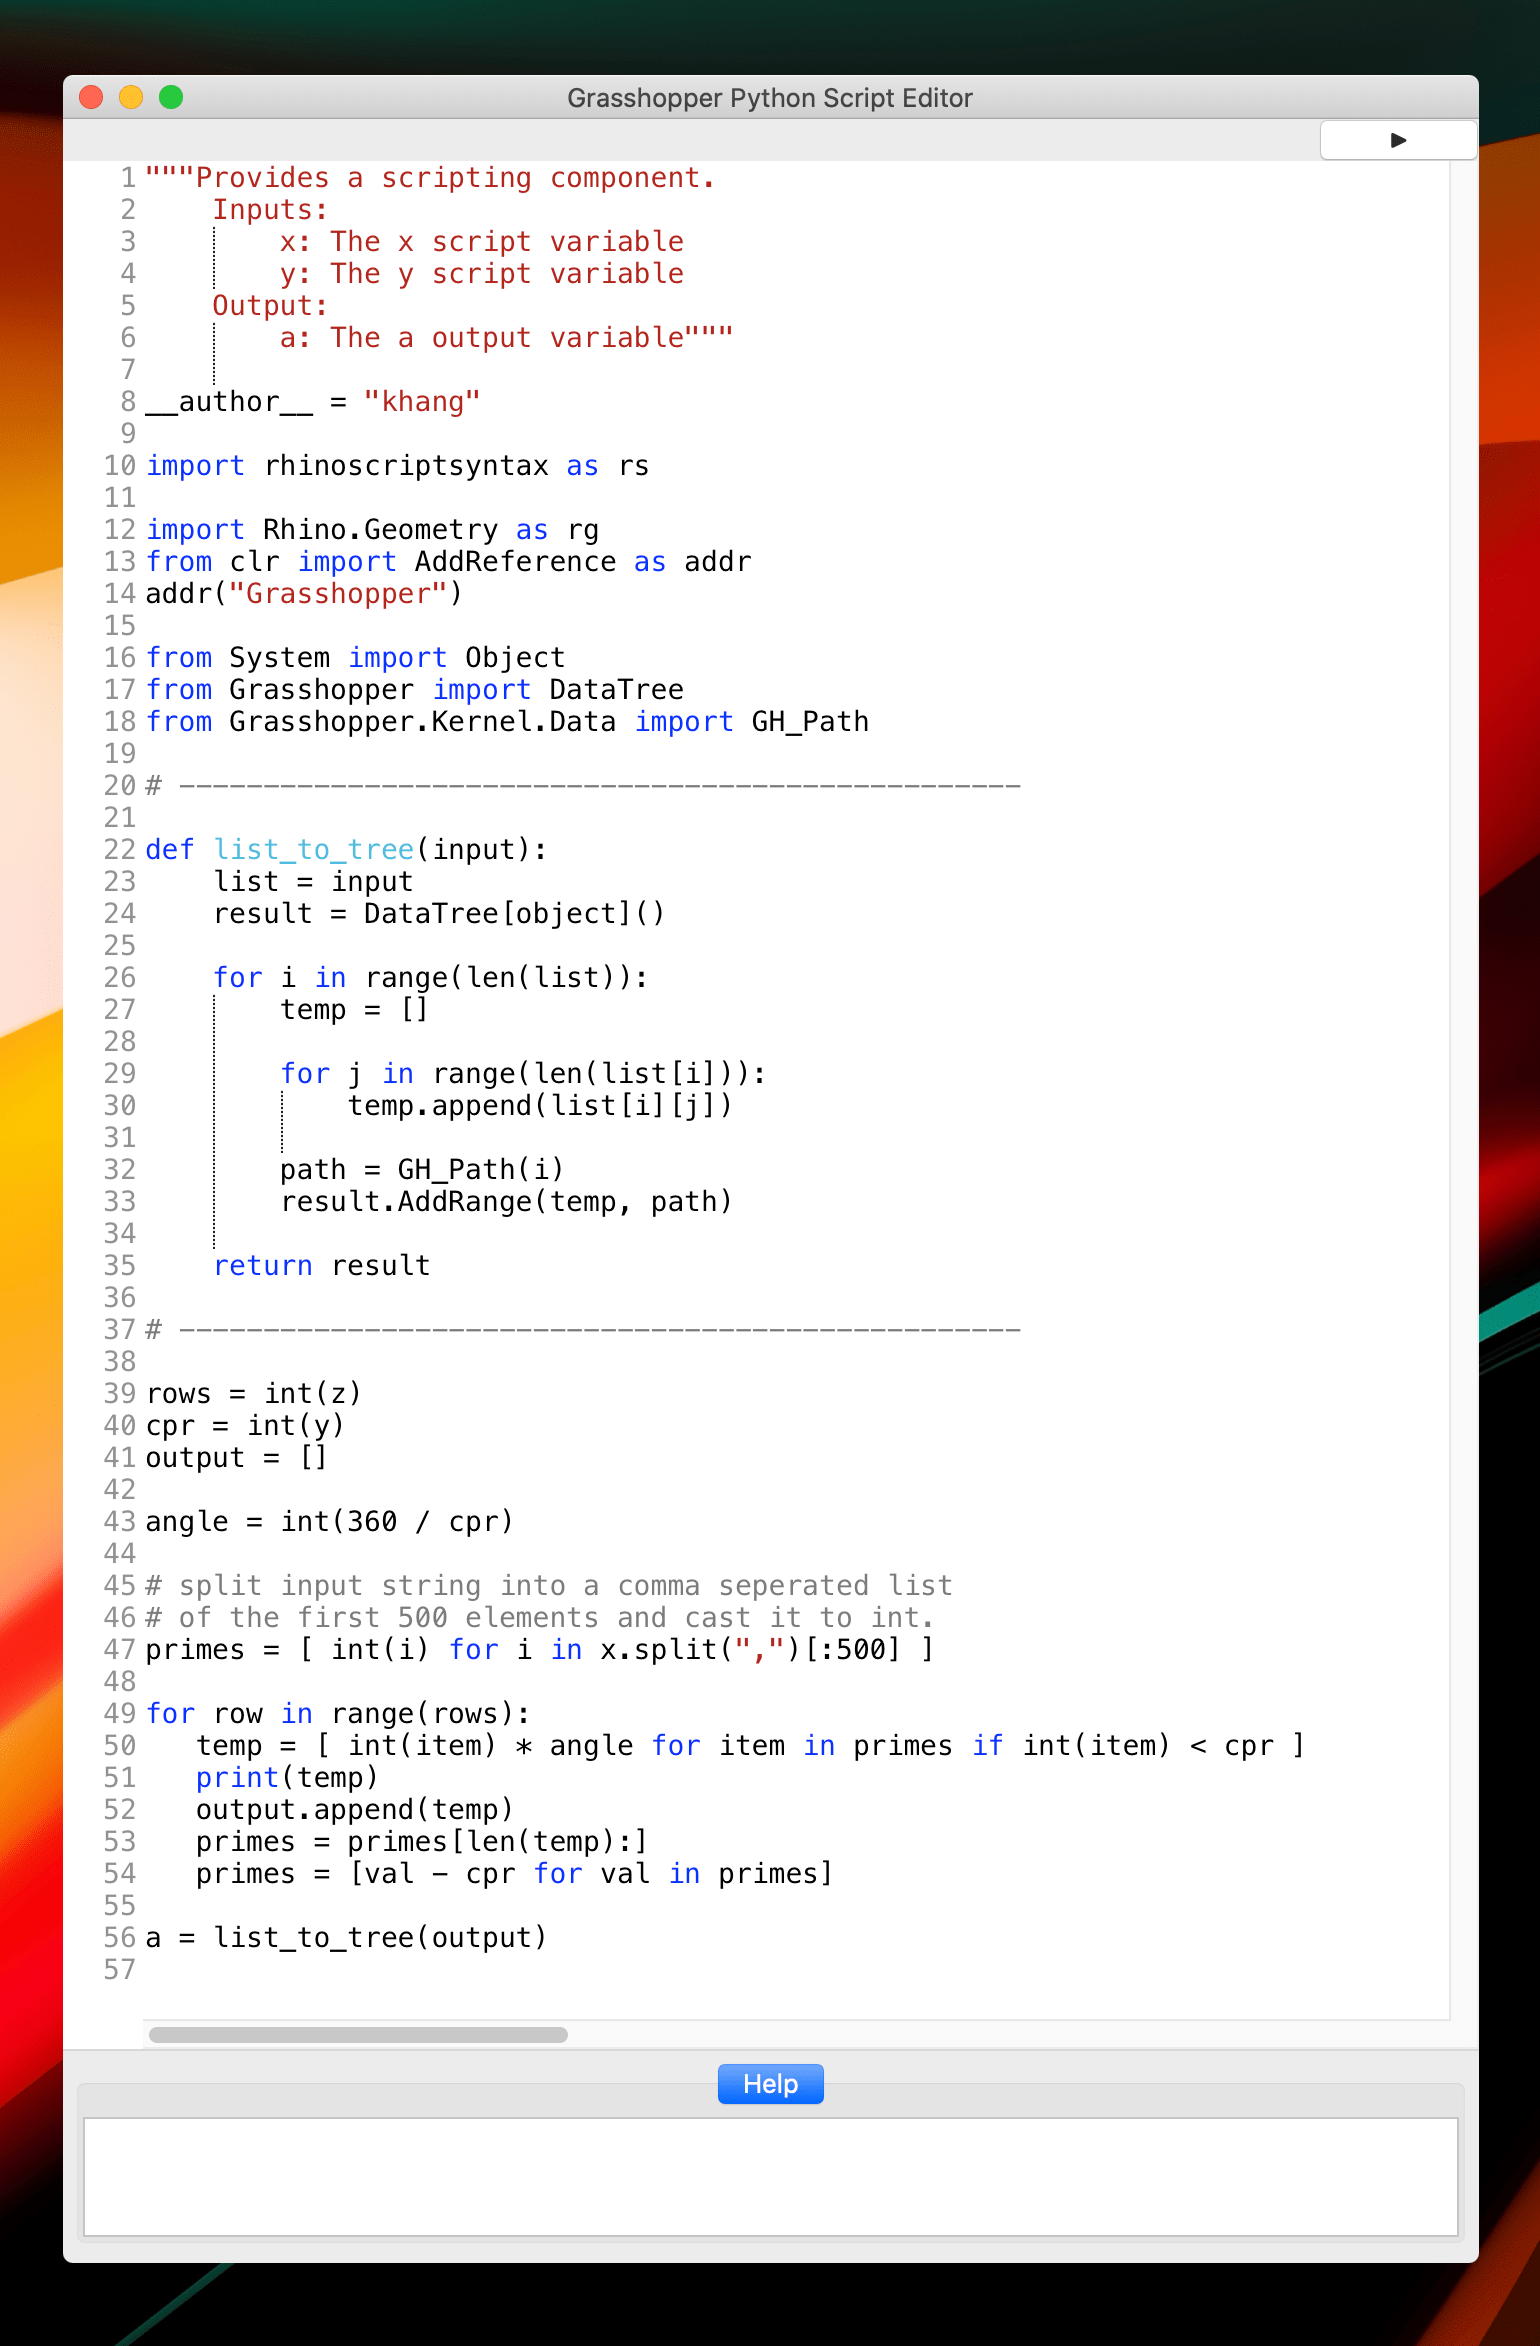
I started looking into how I can process a given file of prime numbers into a usable list of numbers. After days of trial and error, I realized the best way to do this was to write a Python script.
This was one of the two most challenging part of the project because I had to get familiar with how Grasshopper handles Python scripts and the Grasshopper API as well. The final code is shown below:
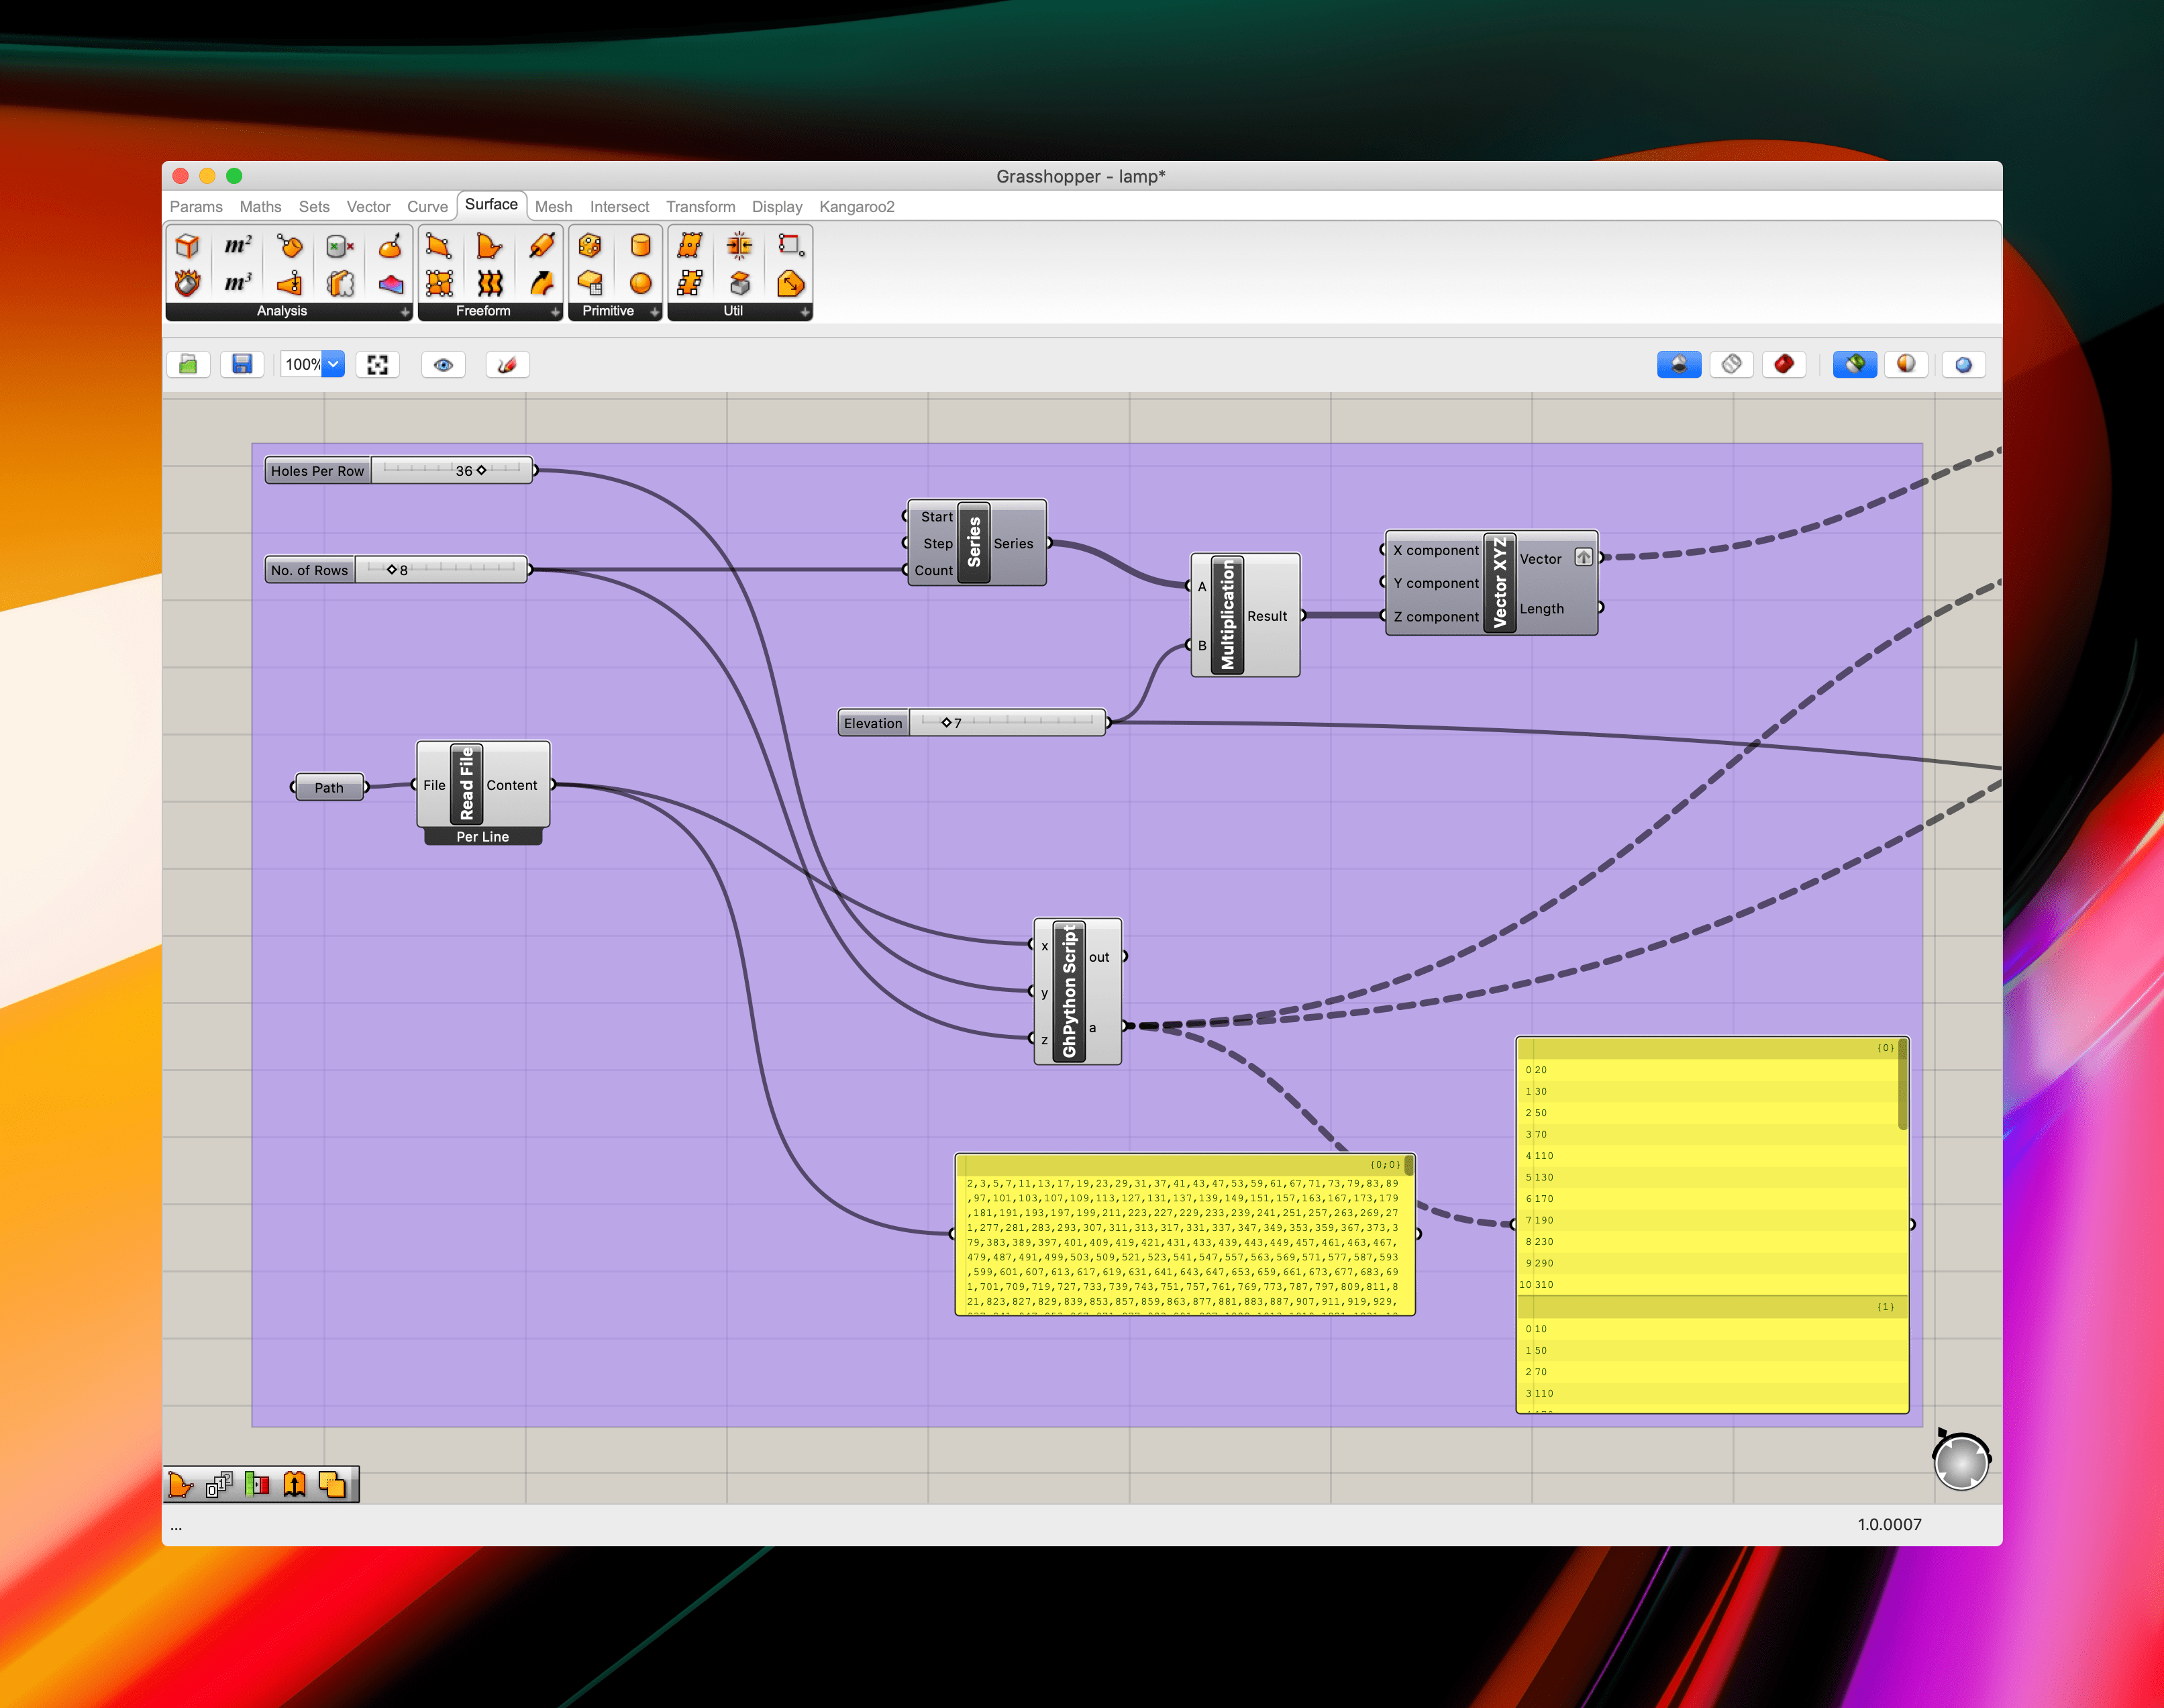
The brief overview of the code works is that the script imports a file with a list of prime numbers, takes in the number of numbers we have per row (e.g 1-36, 37-64,... or 1-10,11-20,...) and the number of rows we want to have, and creates a tree object containing the resulting angles for each row. The list_to_tree function was copied from this very helpful blog. The final Grasshopper sequence is shown below and the resulting data tree is shown in the rightmost panel.
3. Rotating The Cylinders
The 2nd hardest part of this project was to figure out how to actually use the giant list of lists in other modules. The solution I came up with was using a function called ExplodeTree which splits up the data tree into individual lists. This can then be inputted into the Rotate module along with the list of duplicated cylinders to rotate each cylinder on each row to the correct angle.
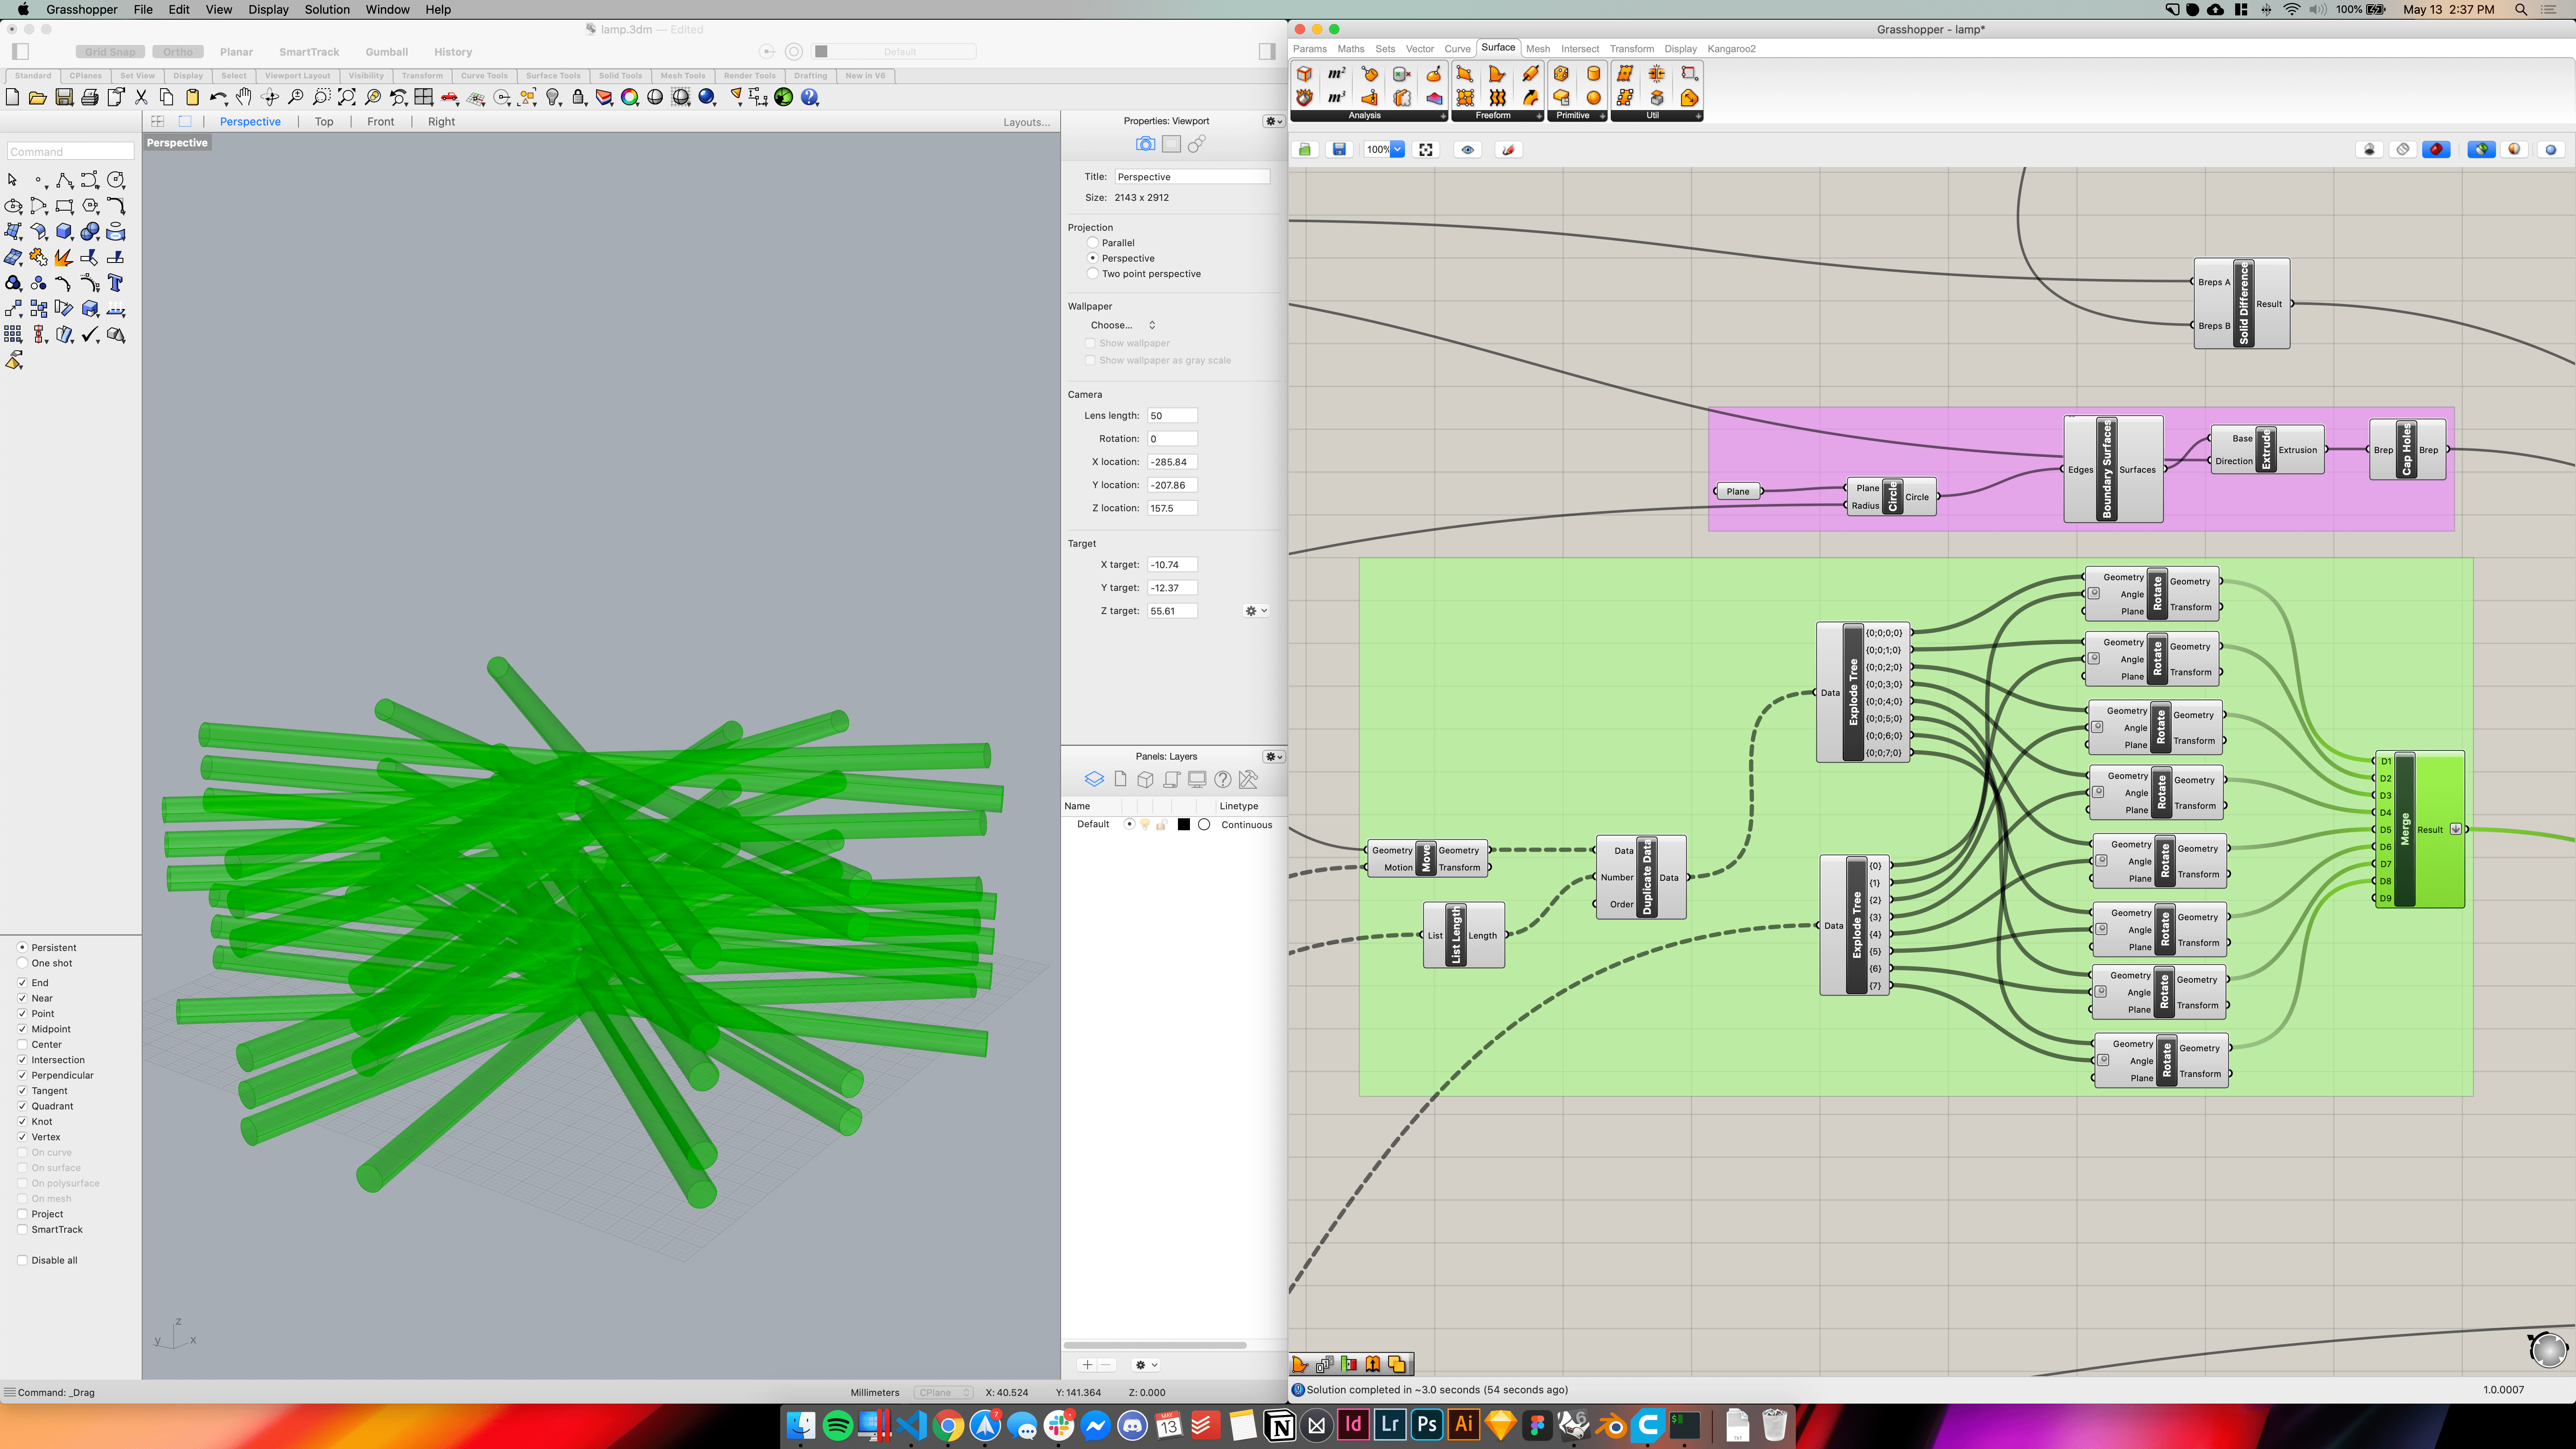
This solution, however, is not scalable since ExplodeTree is not variable and requires you to manually connect / remove wires if you were to adjust the number of rows.
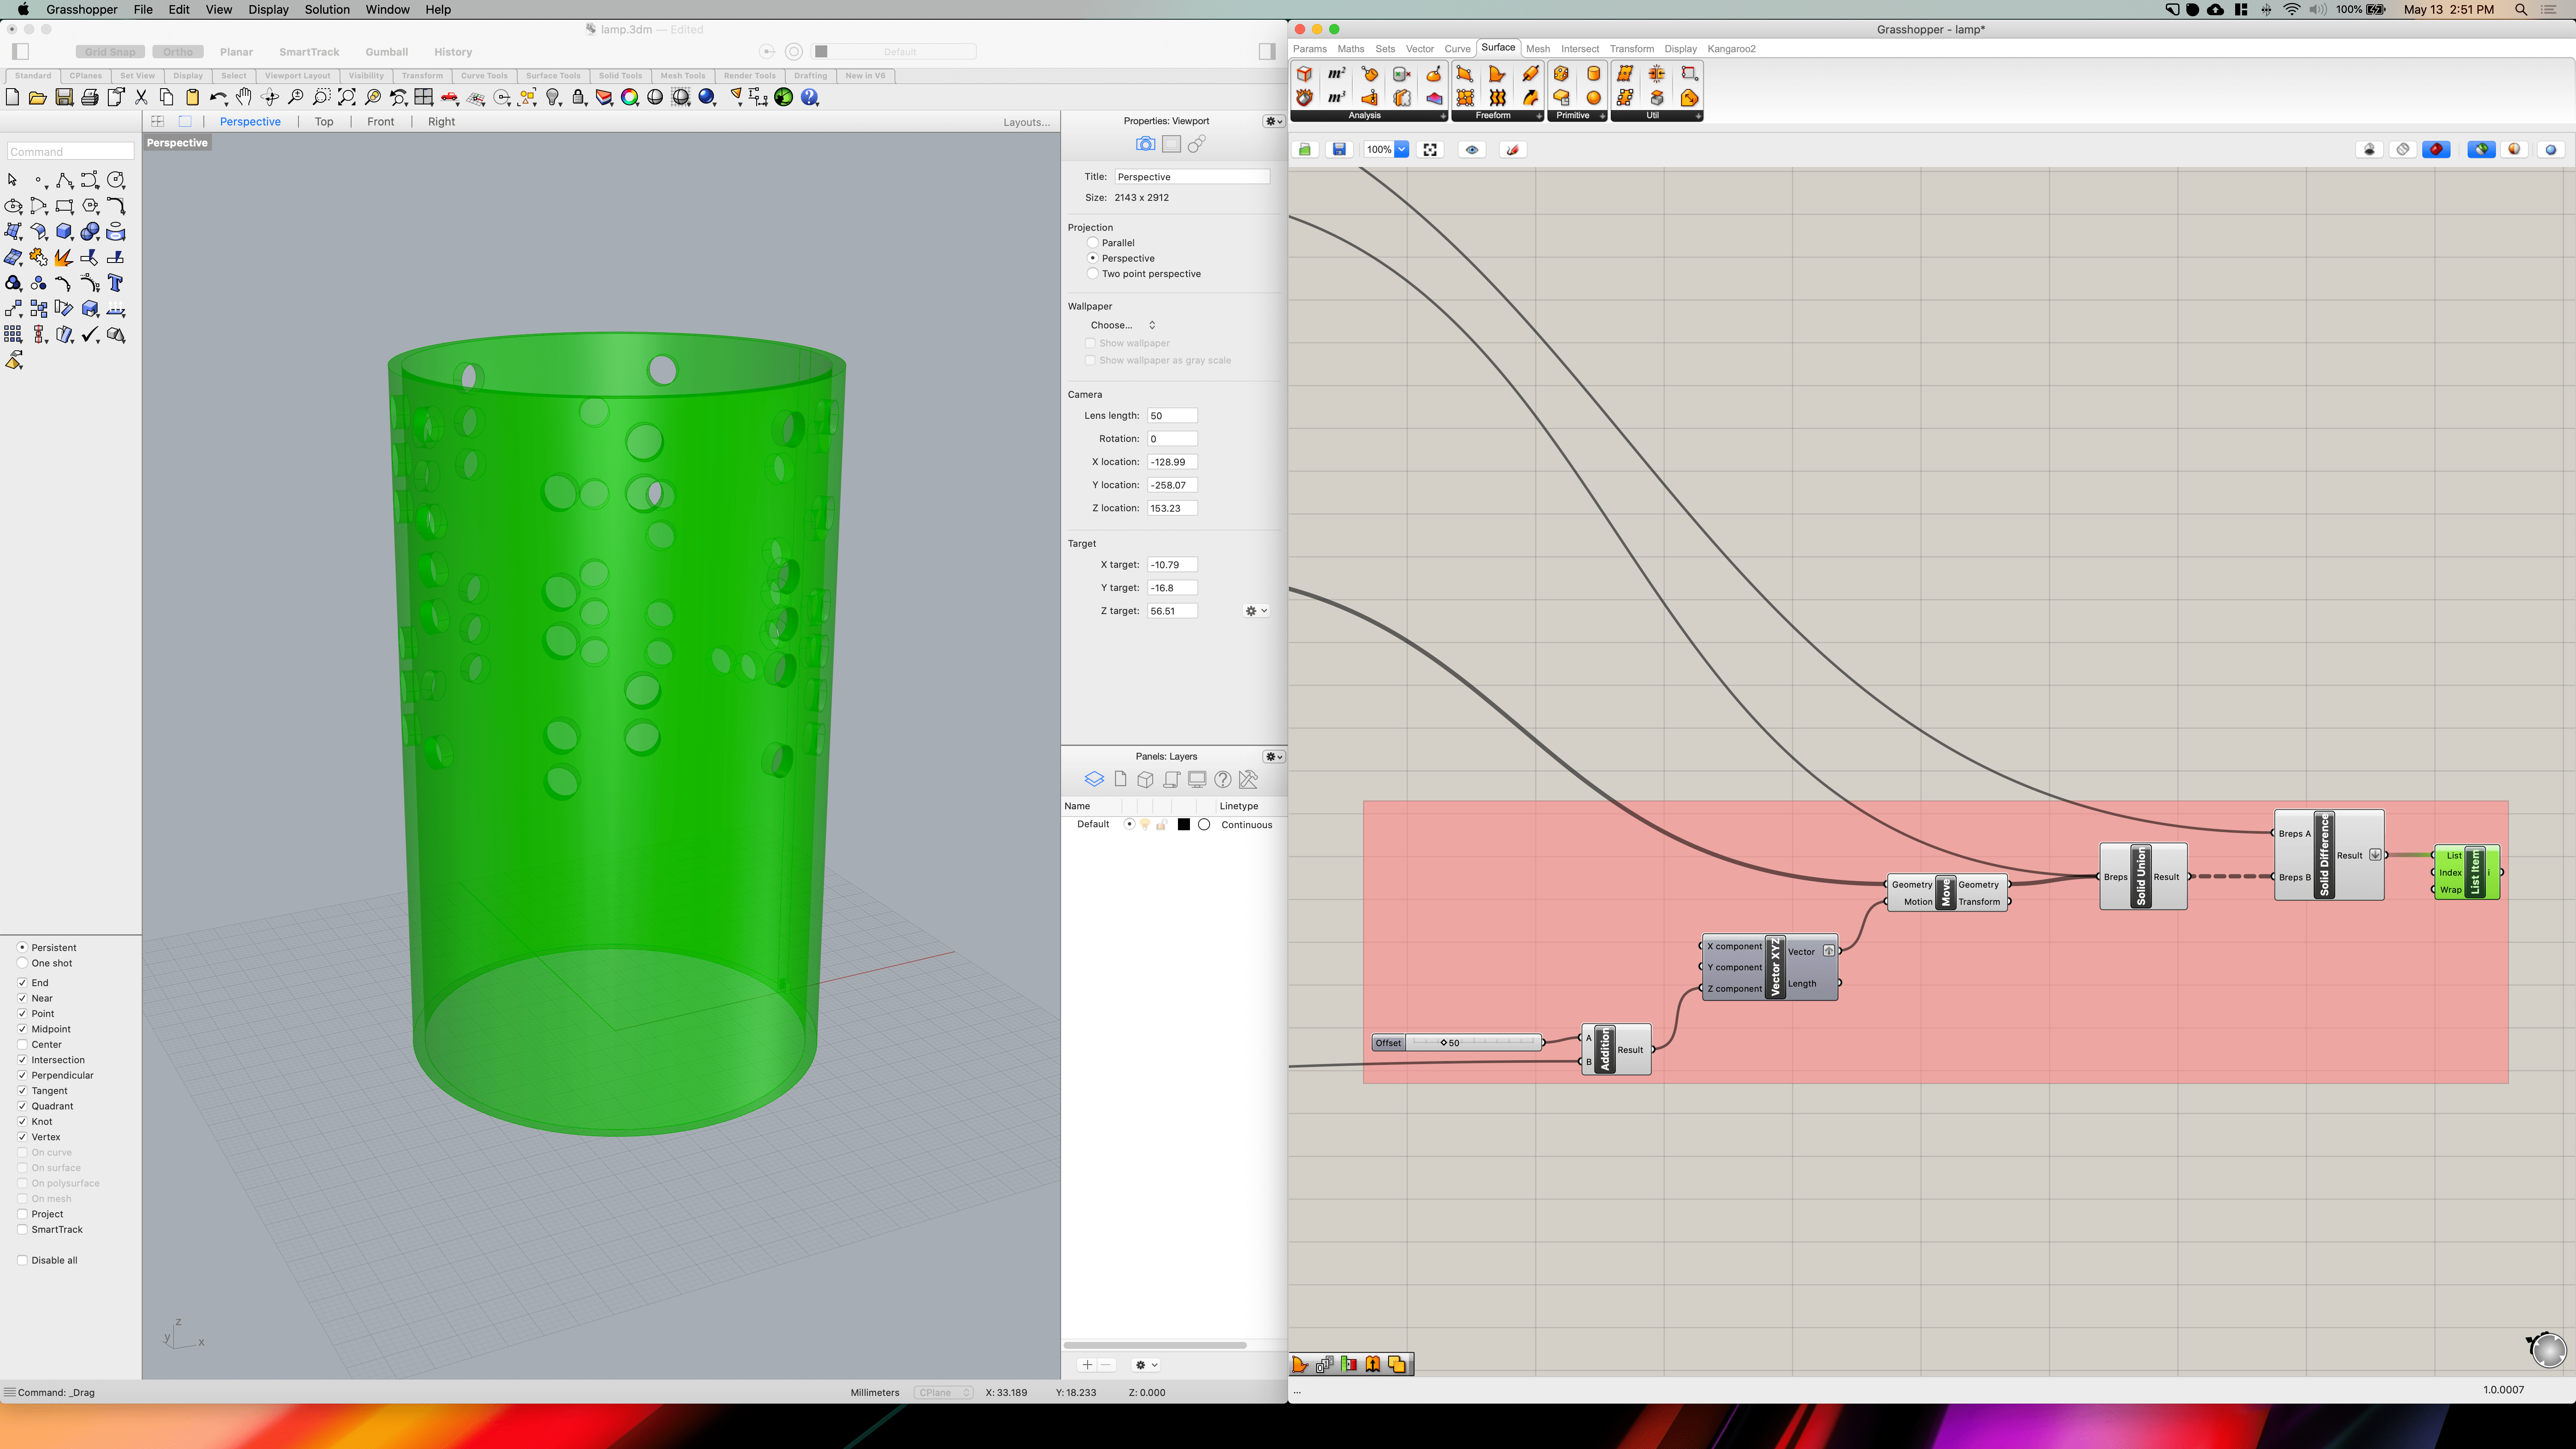
A vertical pole is create to unionize the rows of cylinders into a single closed polysurface. Note that the rows are also pushed upwards to account for the length of the screw contact on the lamp.
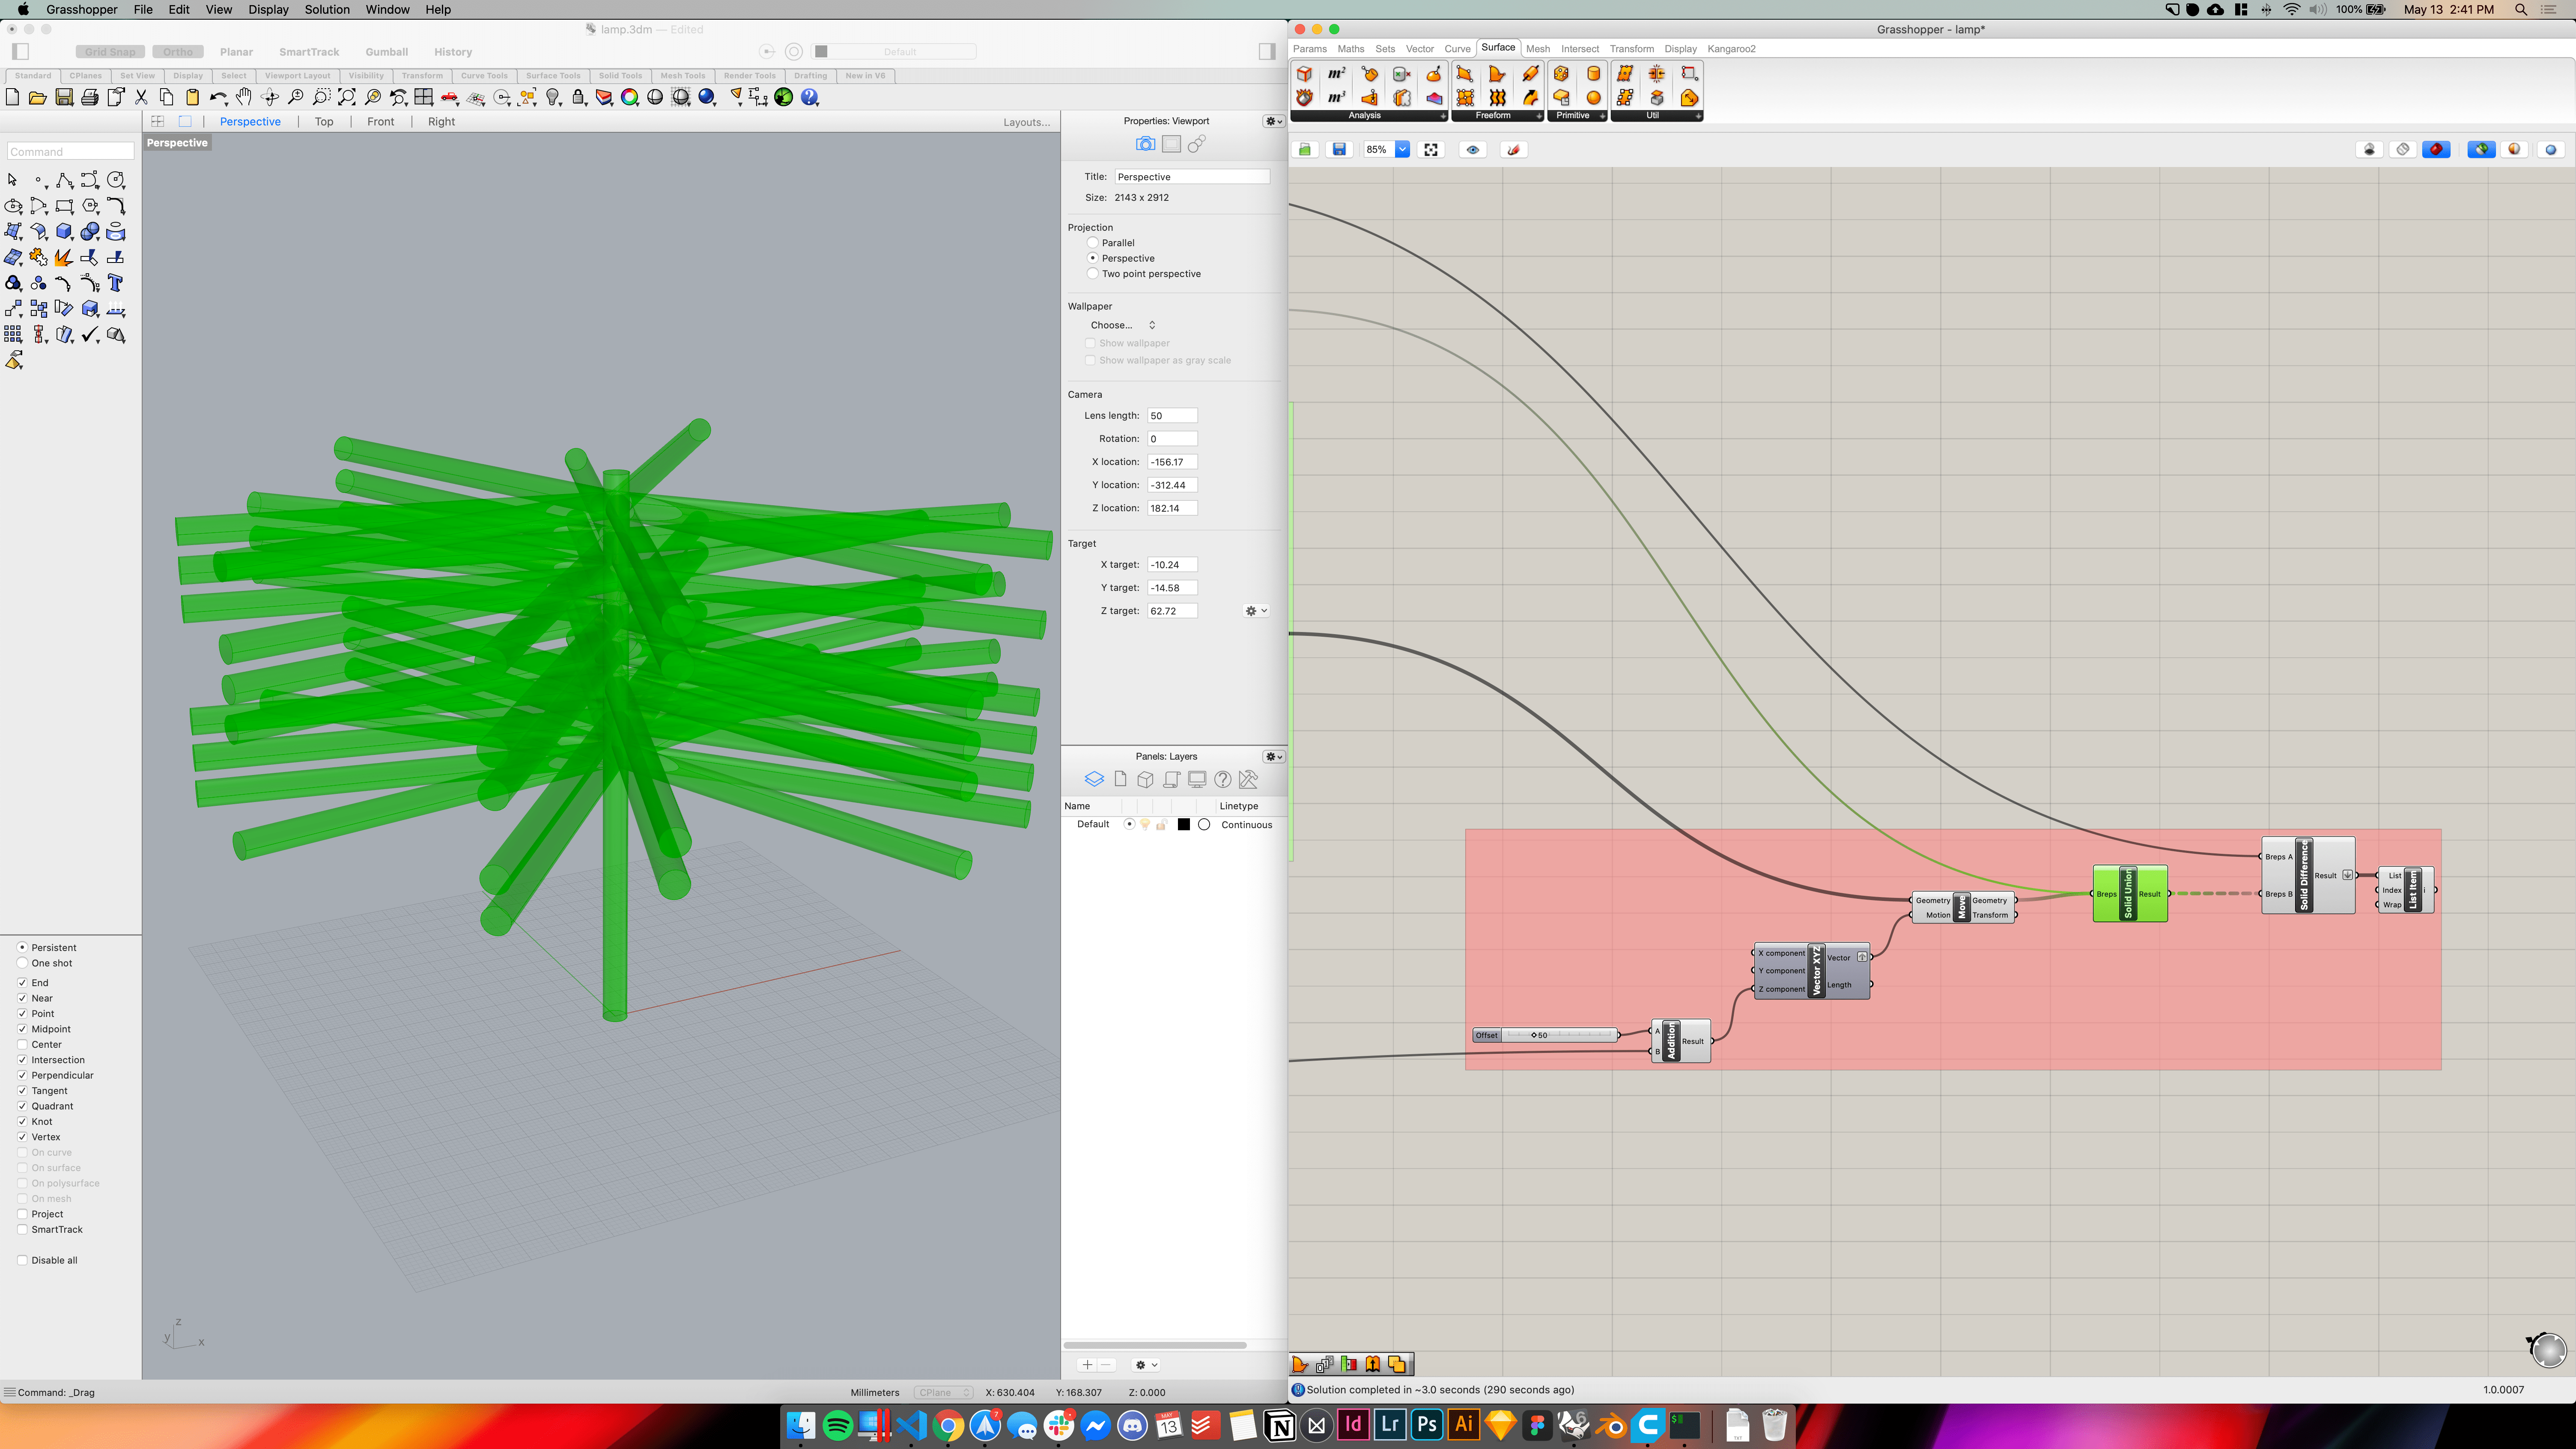
Then, I used the BooleanDifference function to cut out the holes from the lamp shape.
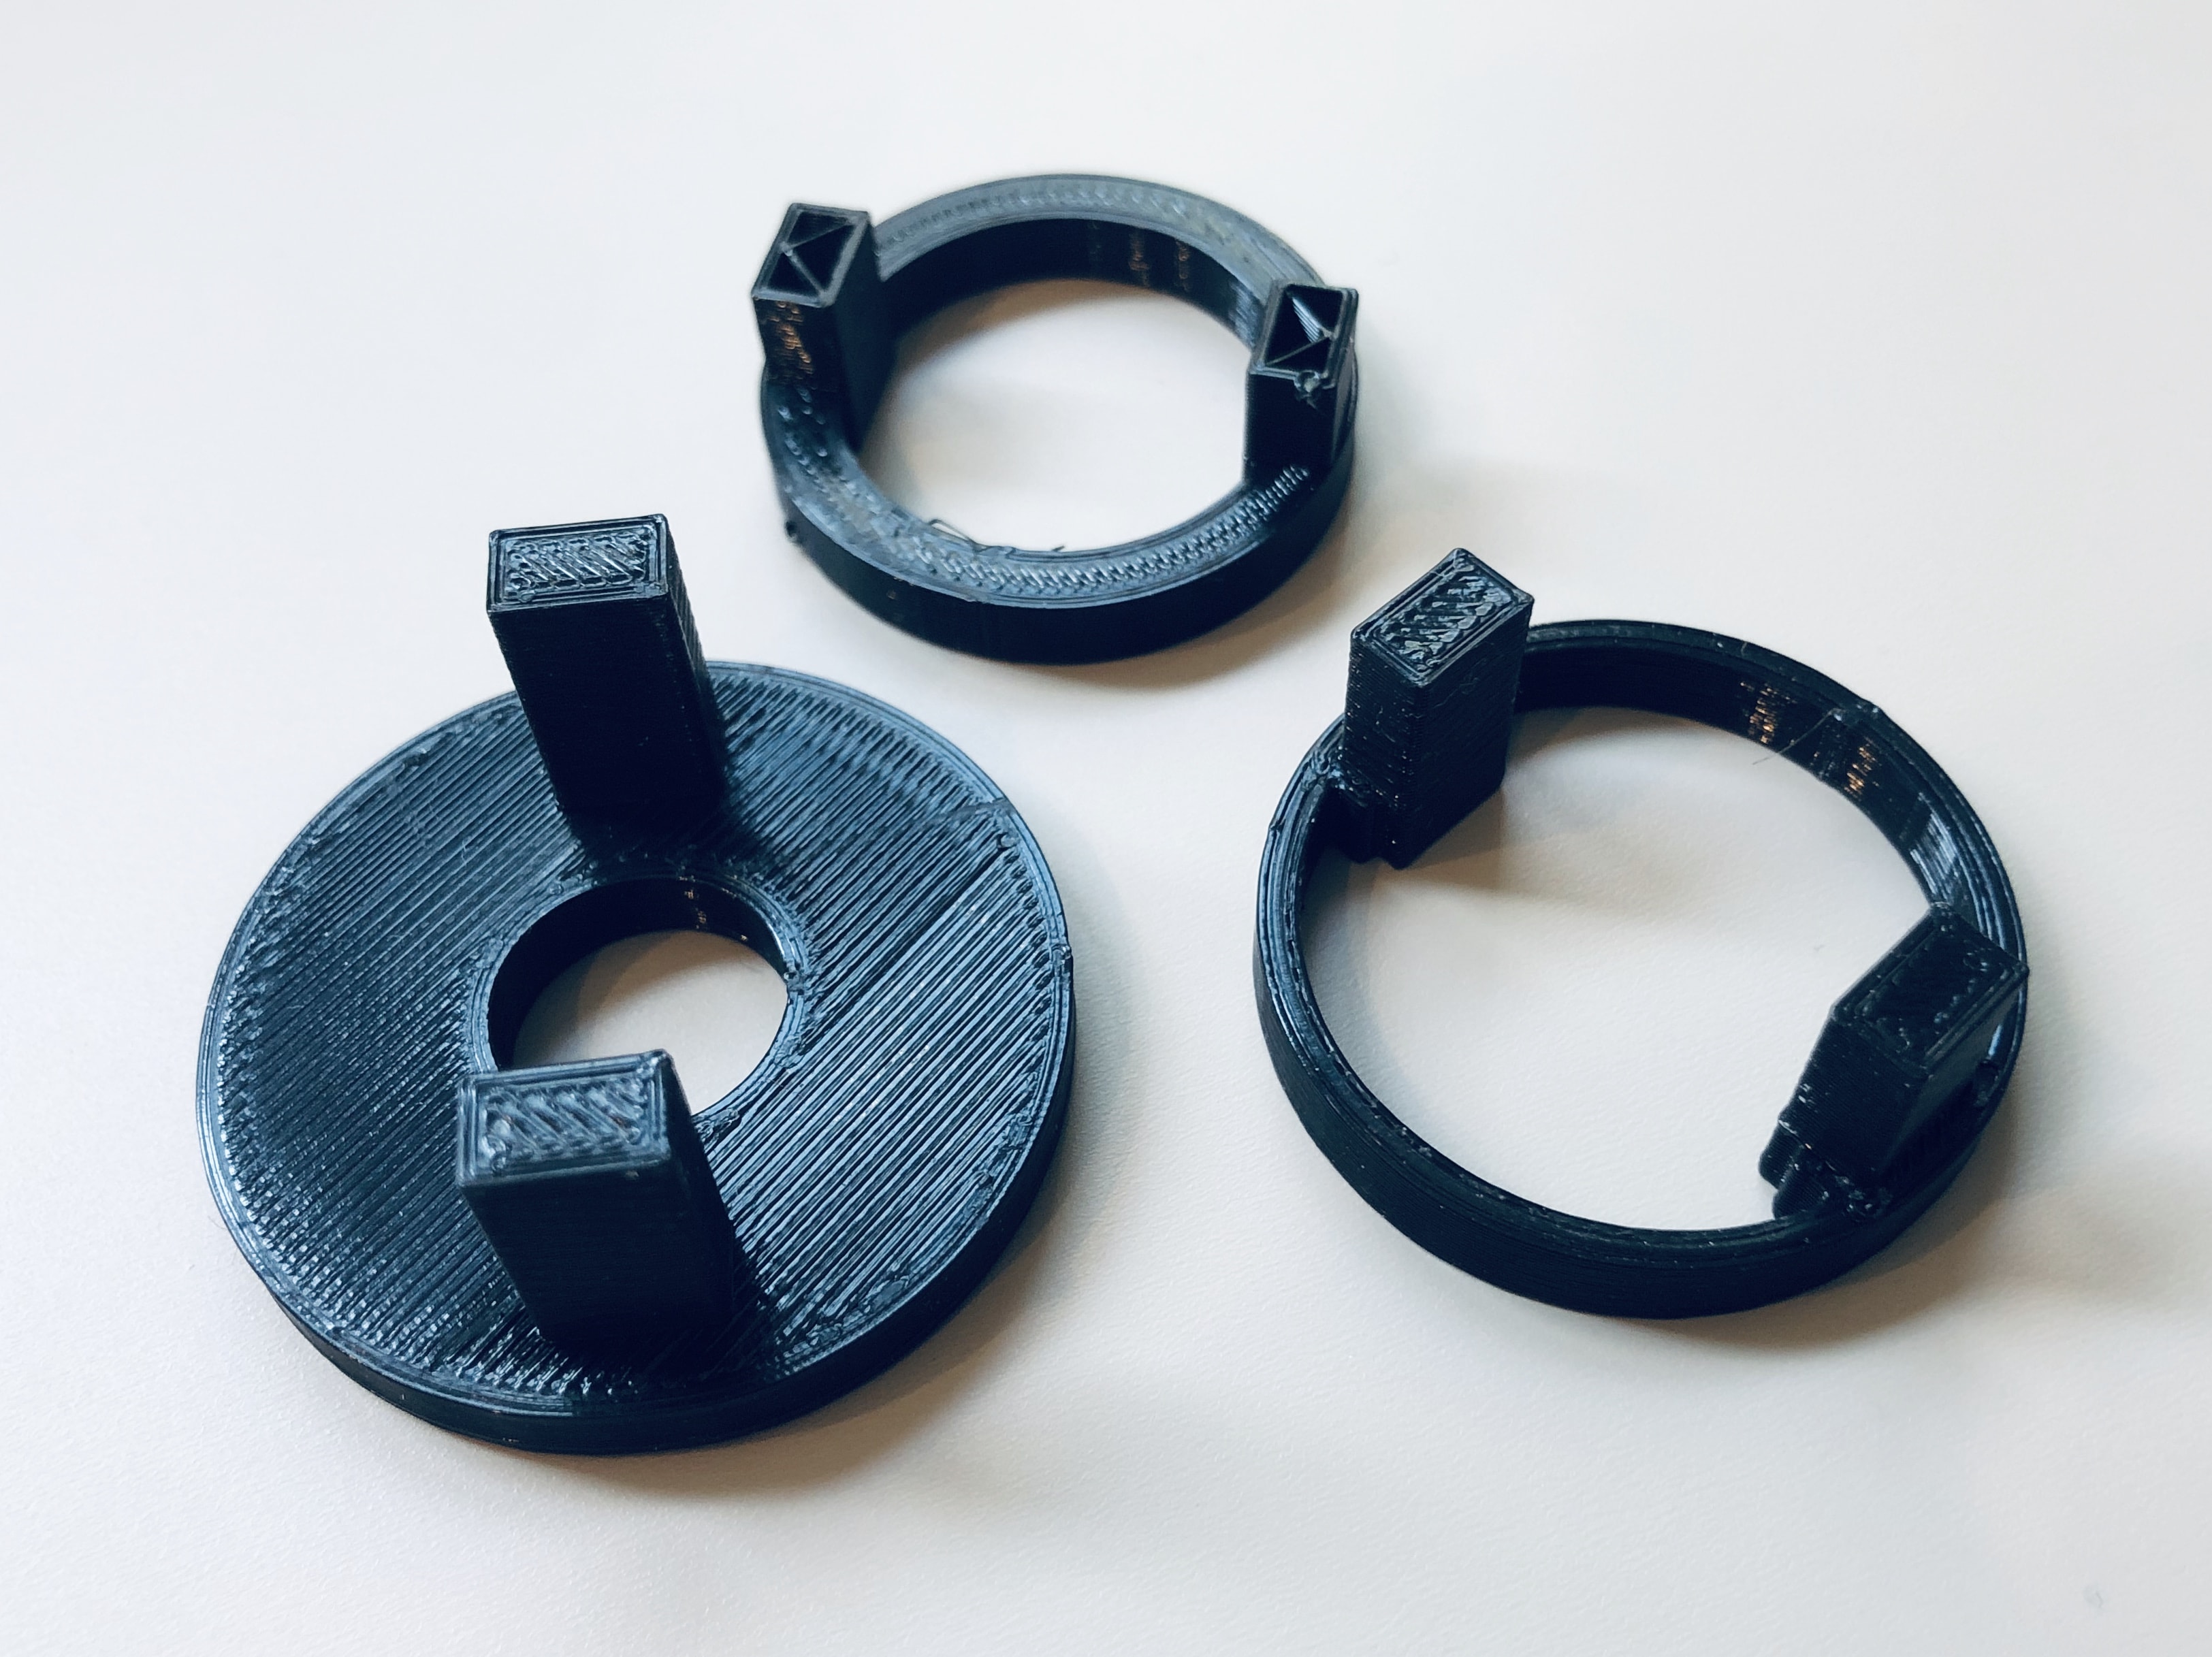
4. Don't Forget To Connect
To actually attach the lamp shade to the lamp innereds, I took use of the holes provided on the lamp innereds. I started by measuring the dimensions of the holes and well as the AC plug. This took some trial and error to figure out the best fitting for the holes and the innereds overall.

5. Bringing It All Together
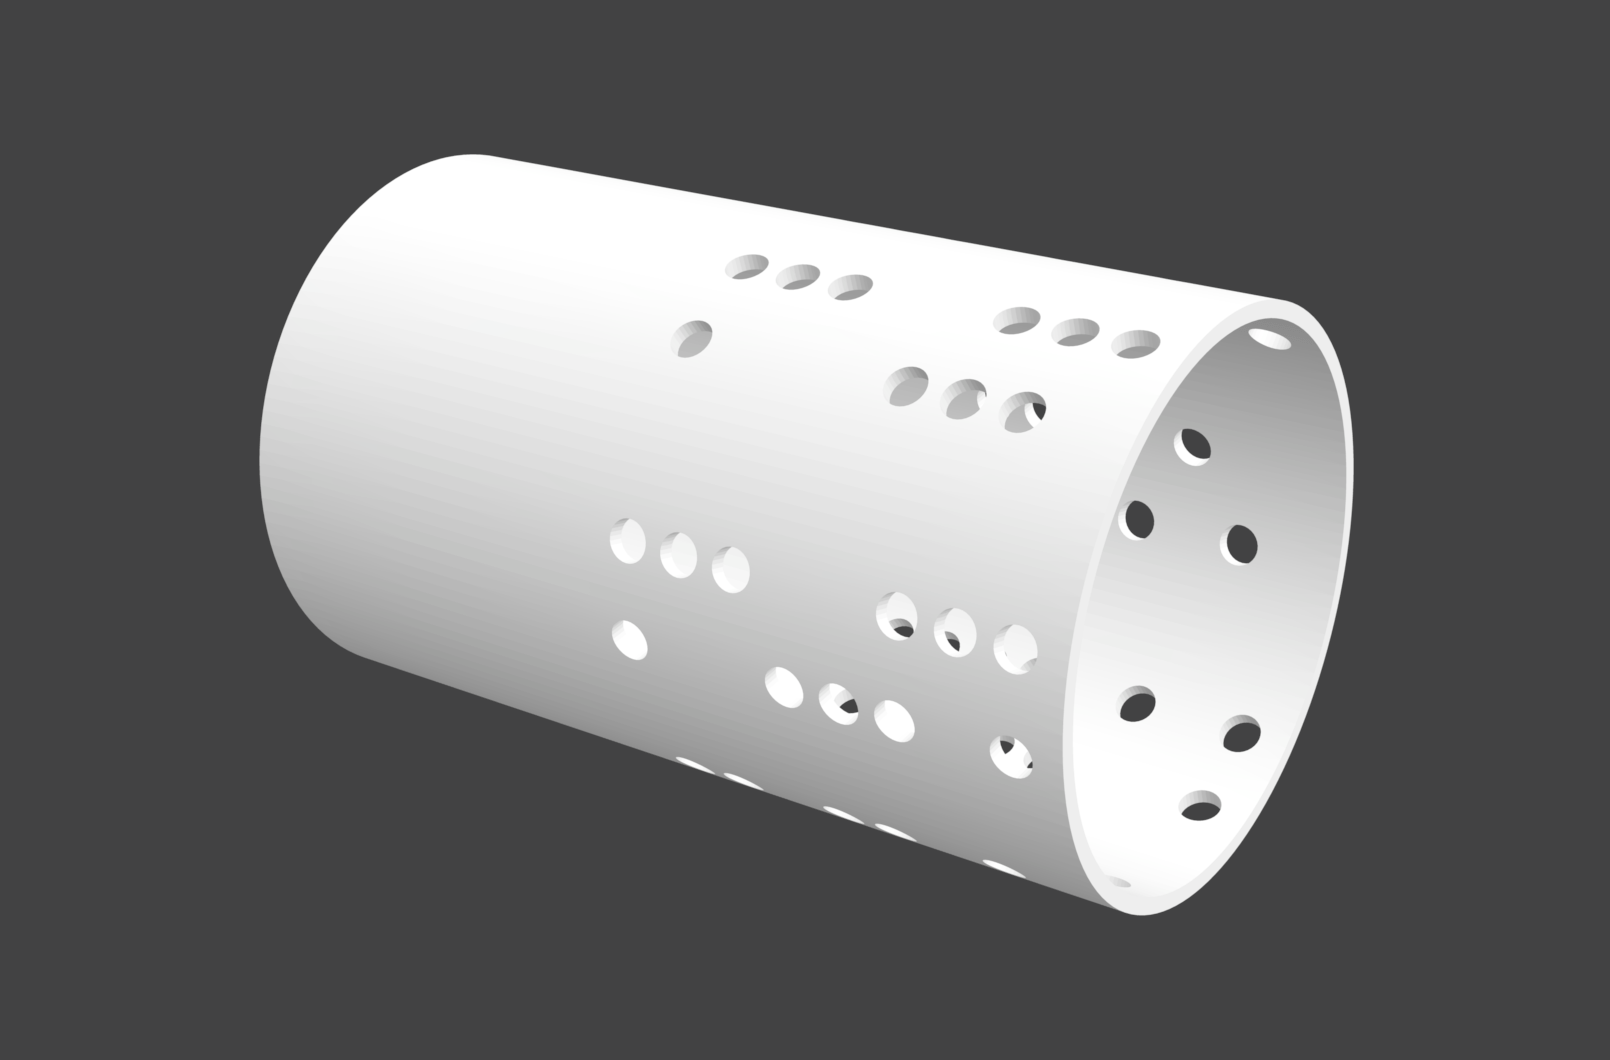
With all the parts done, I simply baked the lamp shade and BooleanUnion the entire thing together as a single .stl file!
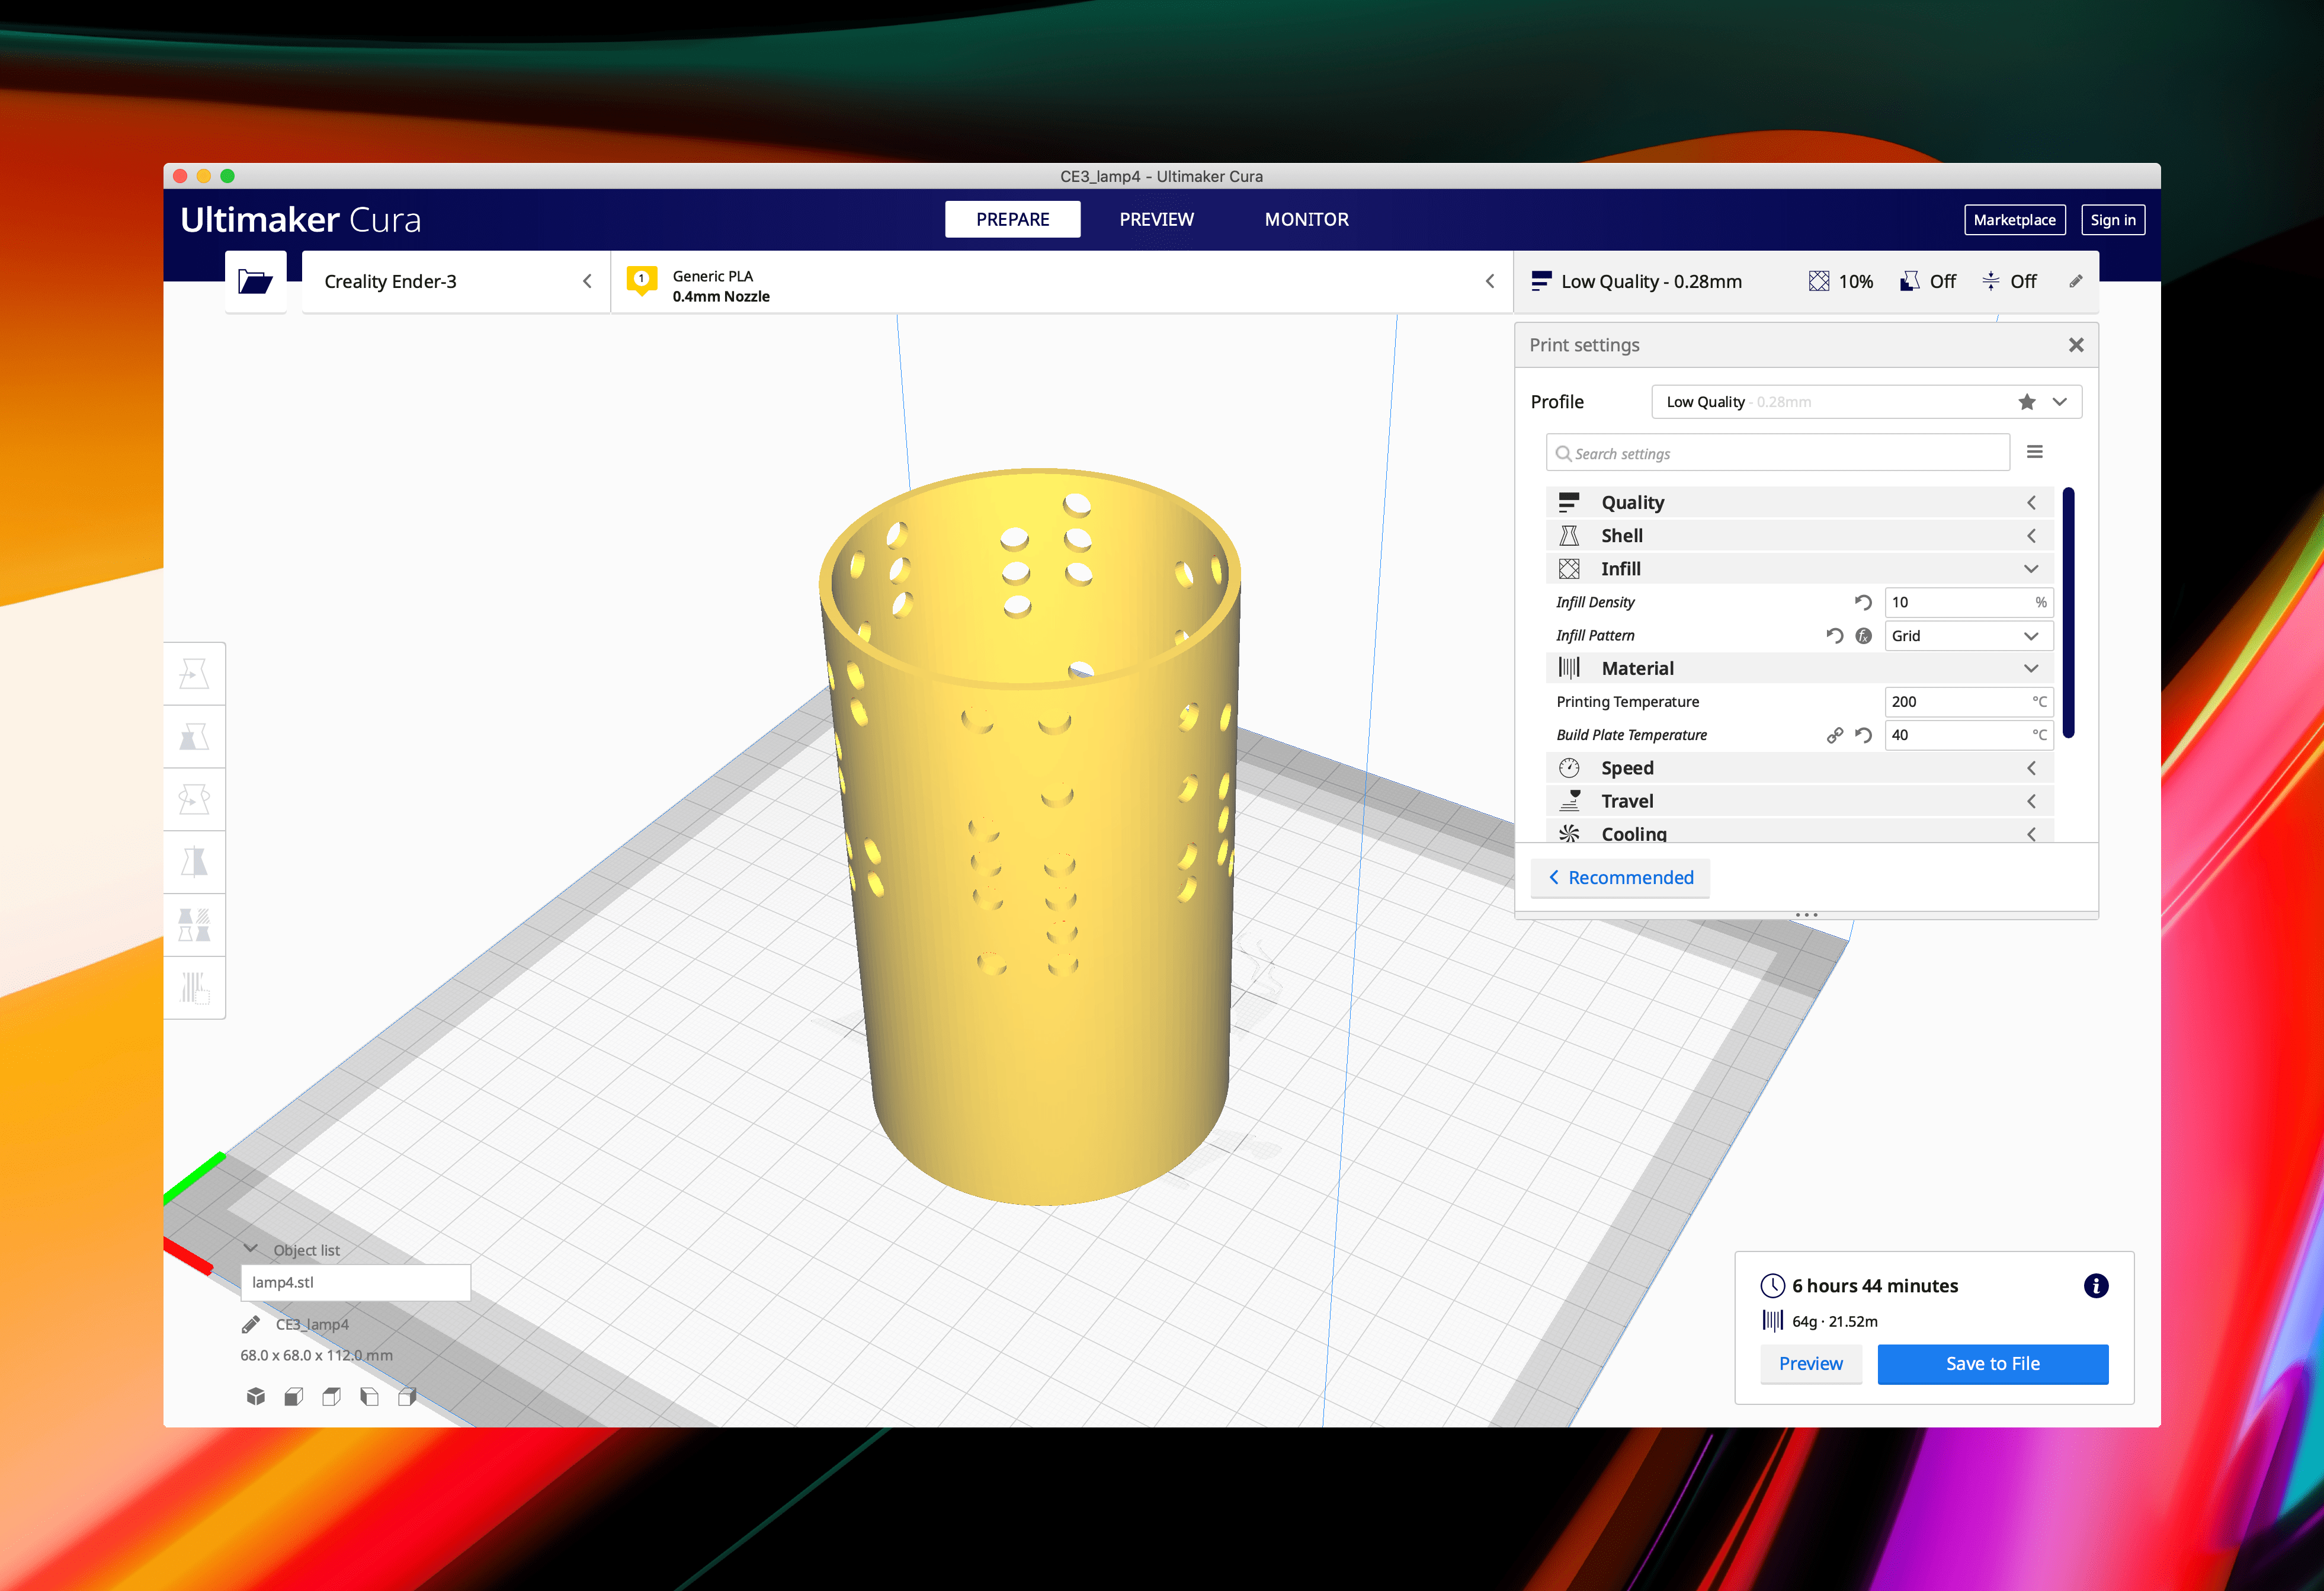
Here's the final print!
Task 2: Cast & Mold Design

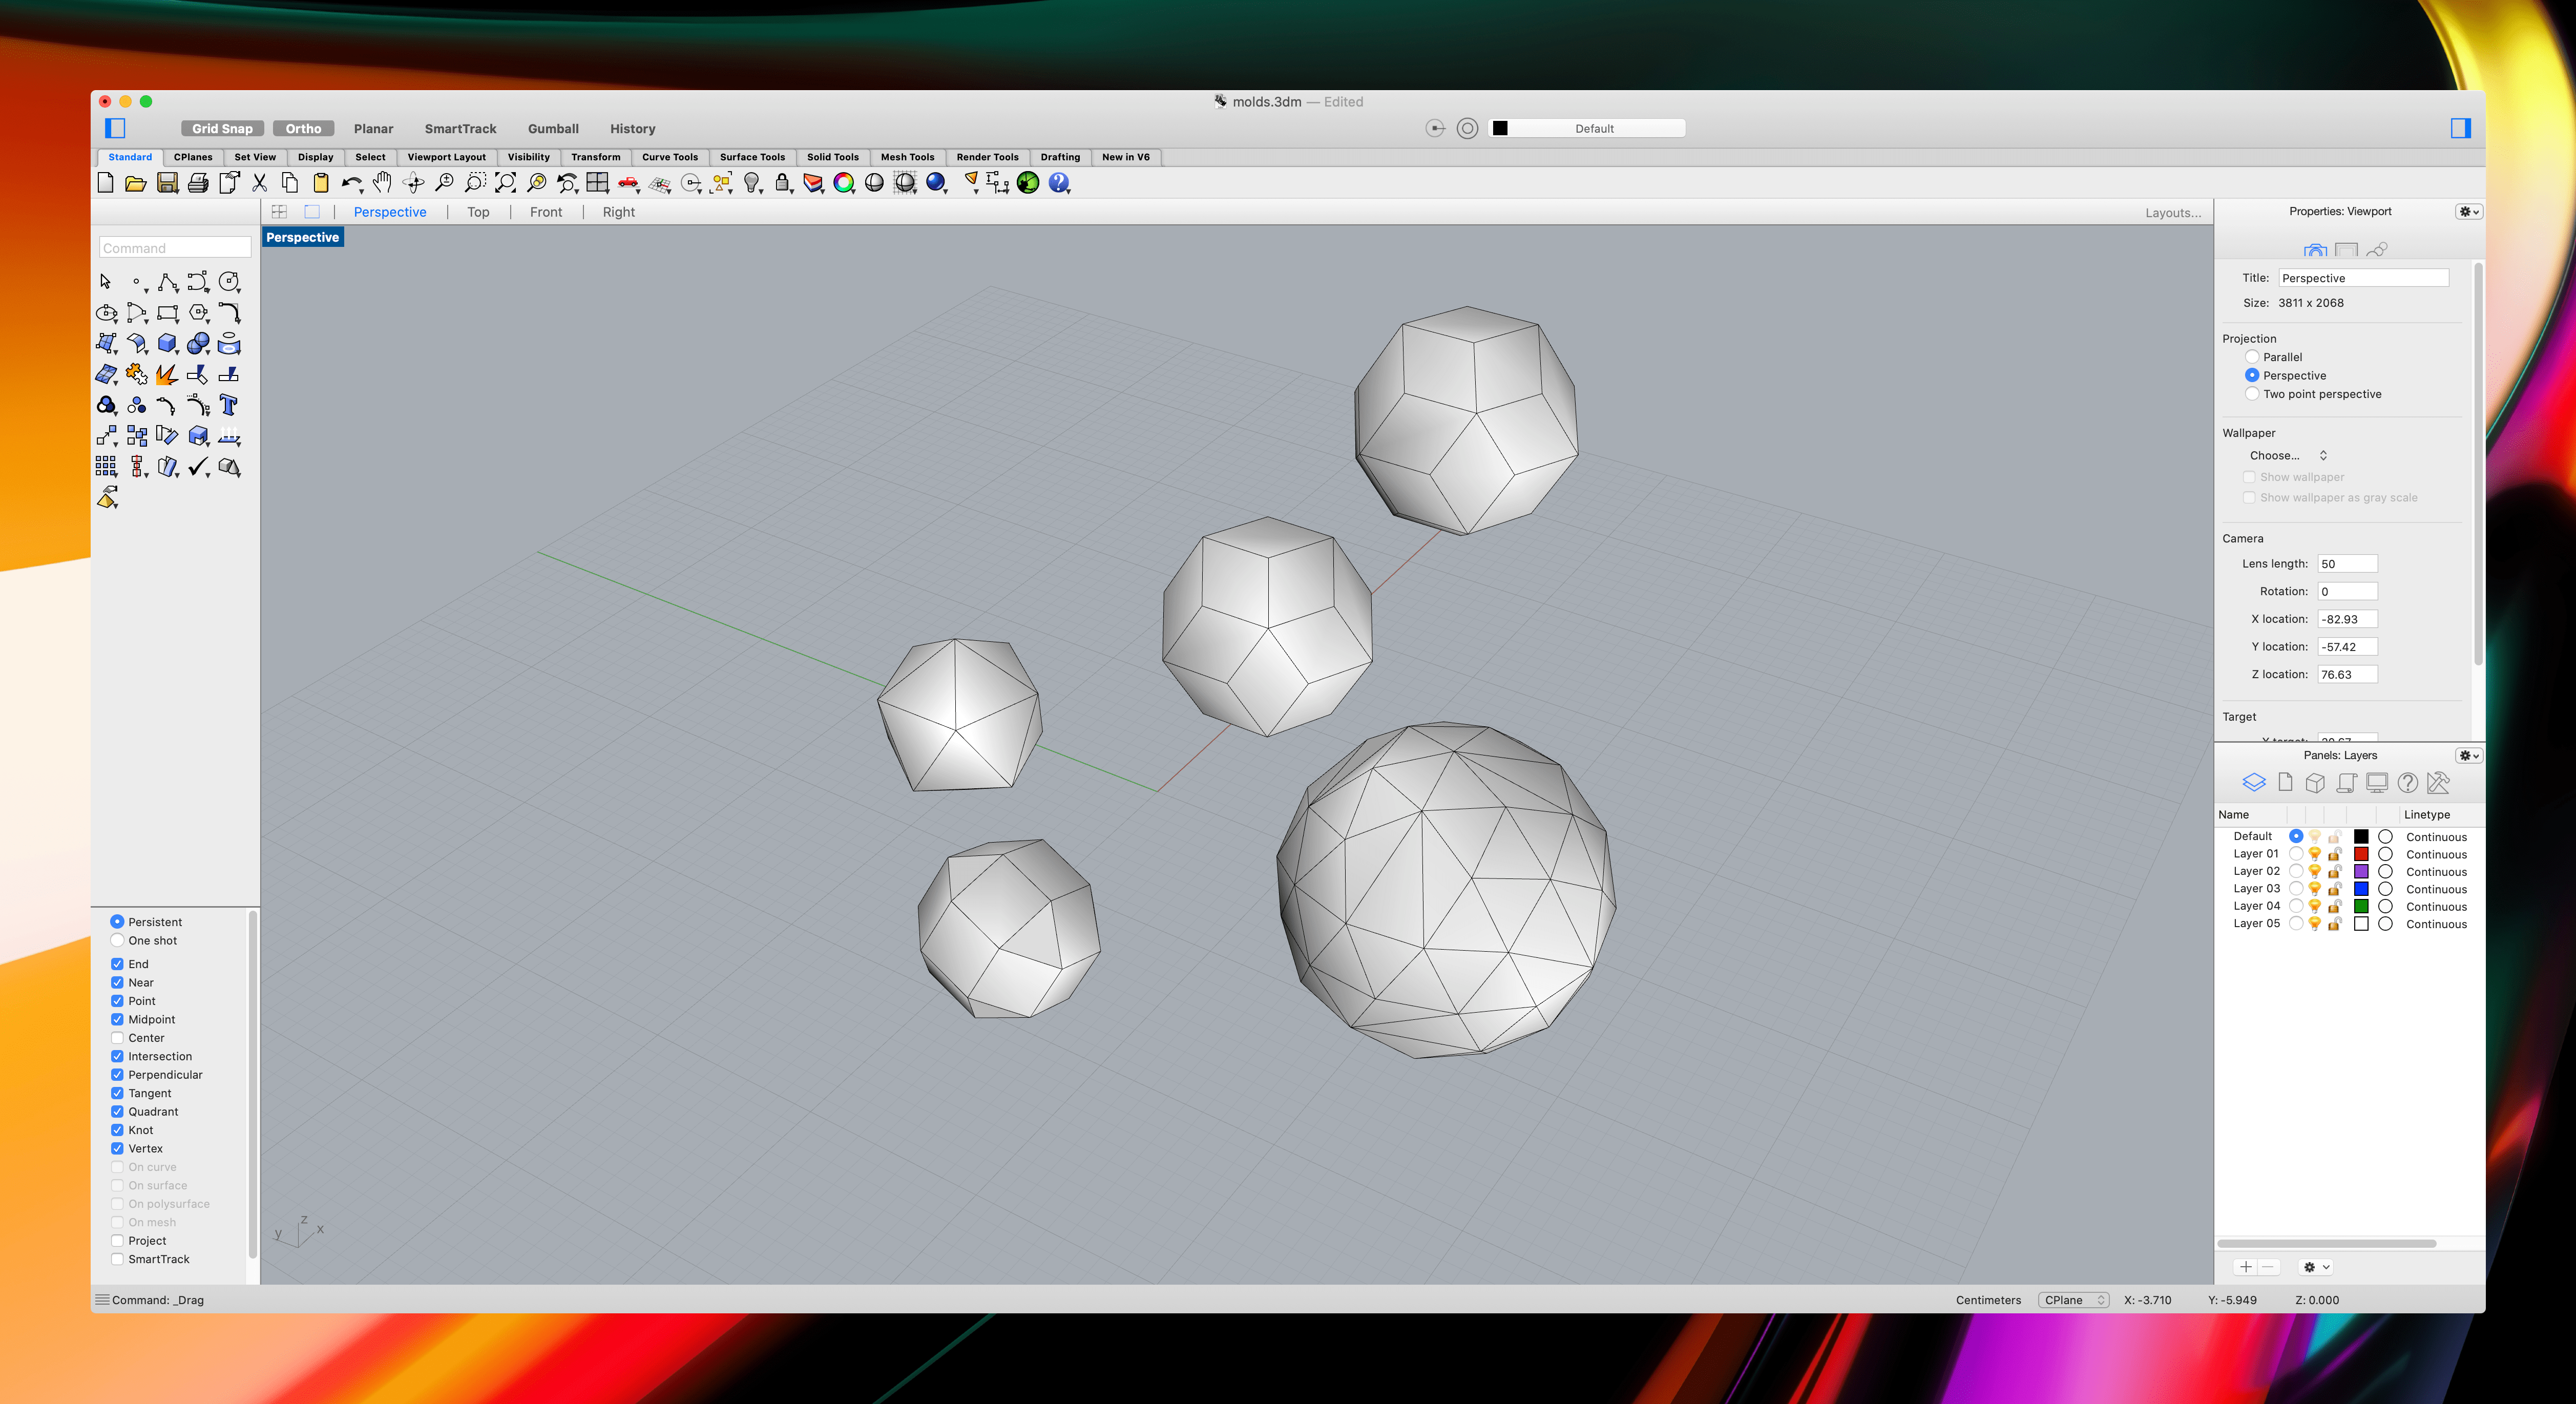
Inspired by the Swedish design studio PLAY TEST MAKE's various work on casted cement. I wanted to create a mini wall made up of repeating polyhedrons.
Currently I'm still messing around with pattern of the wall by playing with different kinds of polyhedron.