WEEK 2
My First Rhino Model!
In this assignment, I created 3 different "cookie cutter" shapes using Photoshop, Illustrator, and Rhino. You can access the final .stl files here.
1. Getting The Images
I started by picking the images of objects that can be recognized by their silhouettes. I ultimately landed on a butterfly, light bulb, and sunglasses.
With the images selected, I then move to Photoshop to prep the images for a trace. I use the magic wand tool to select and delete the background.
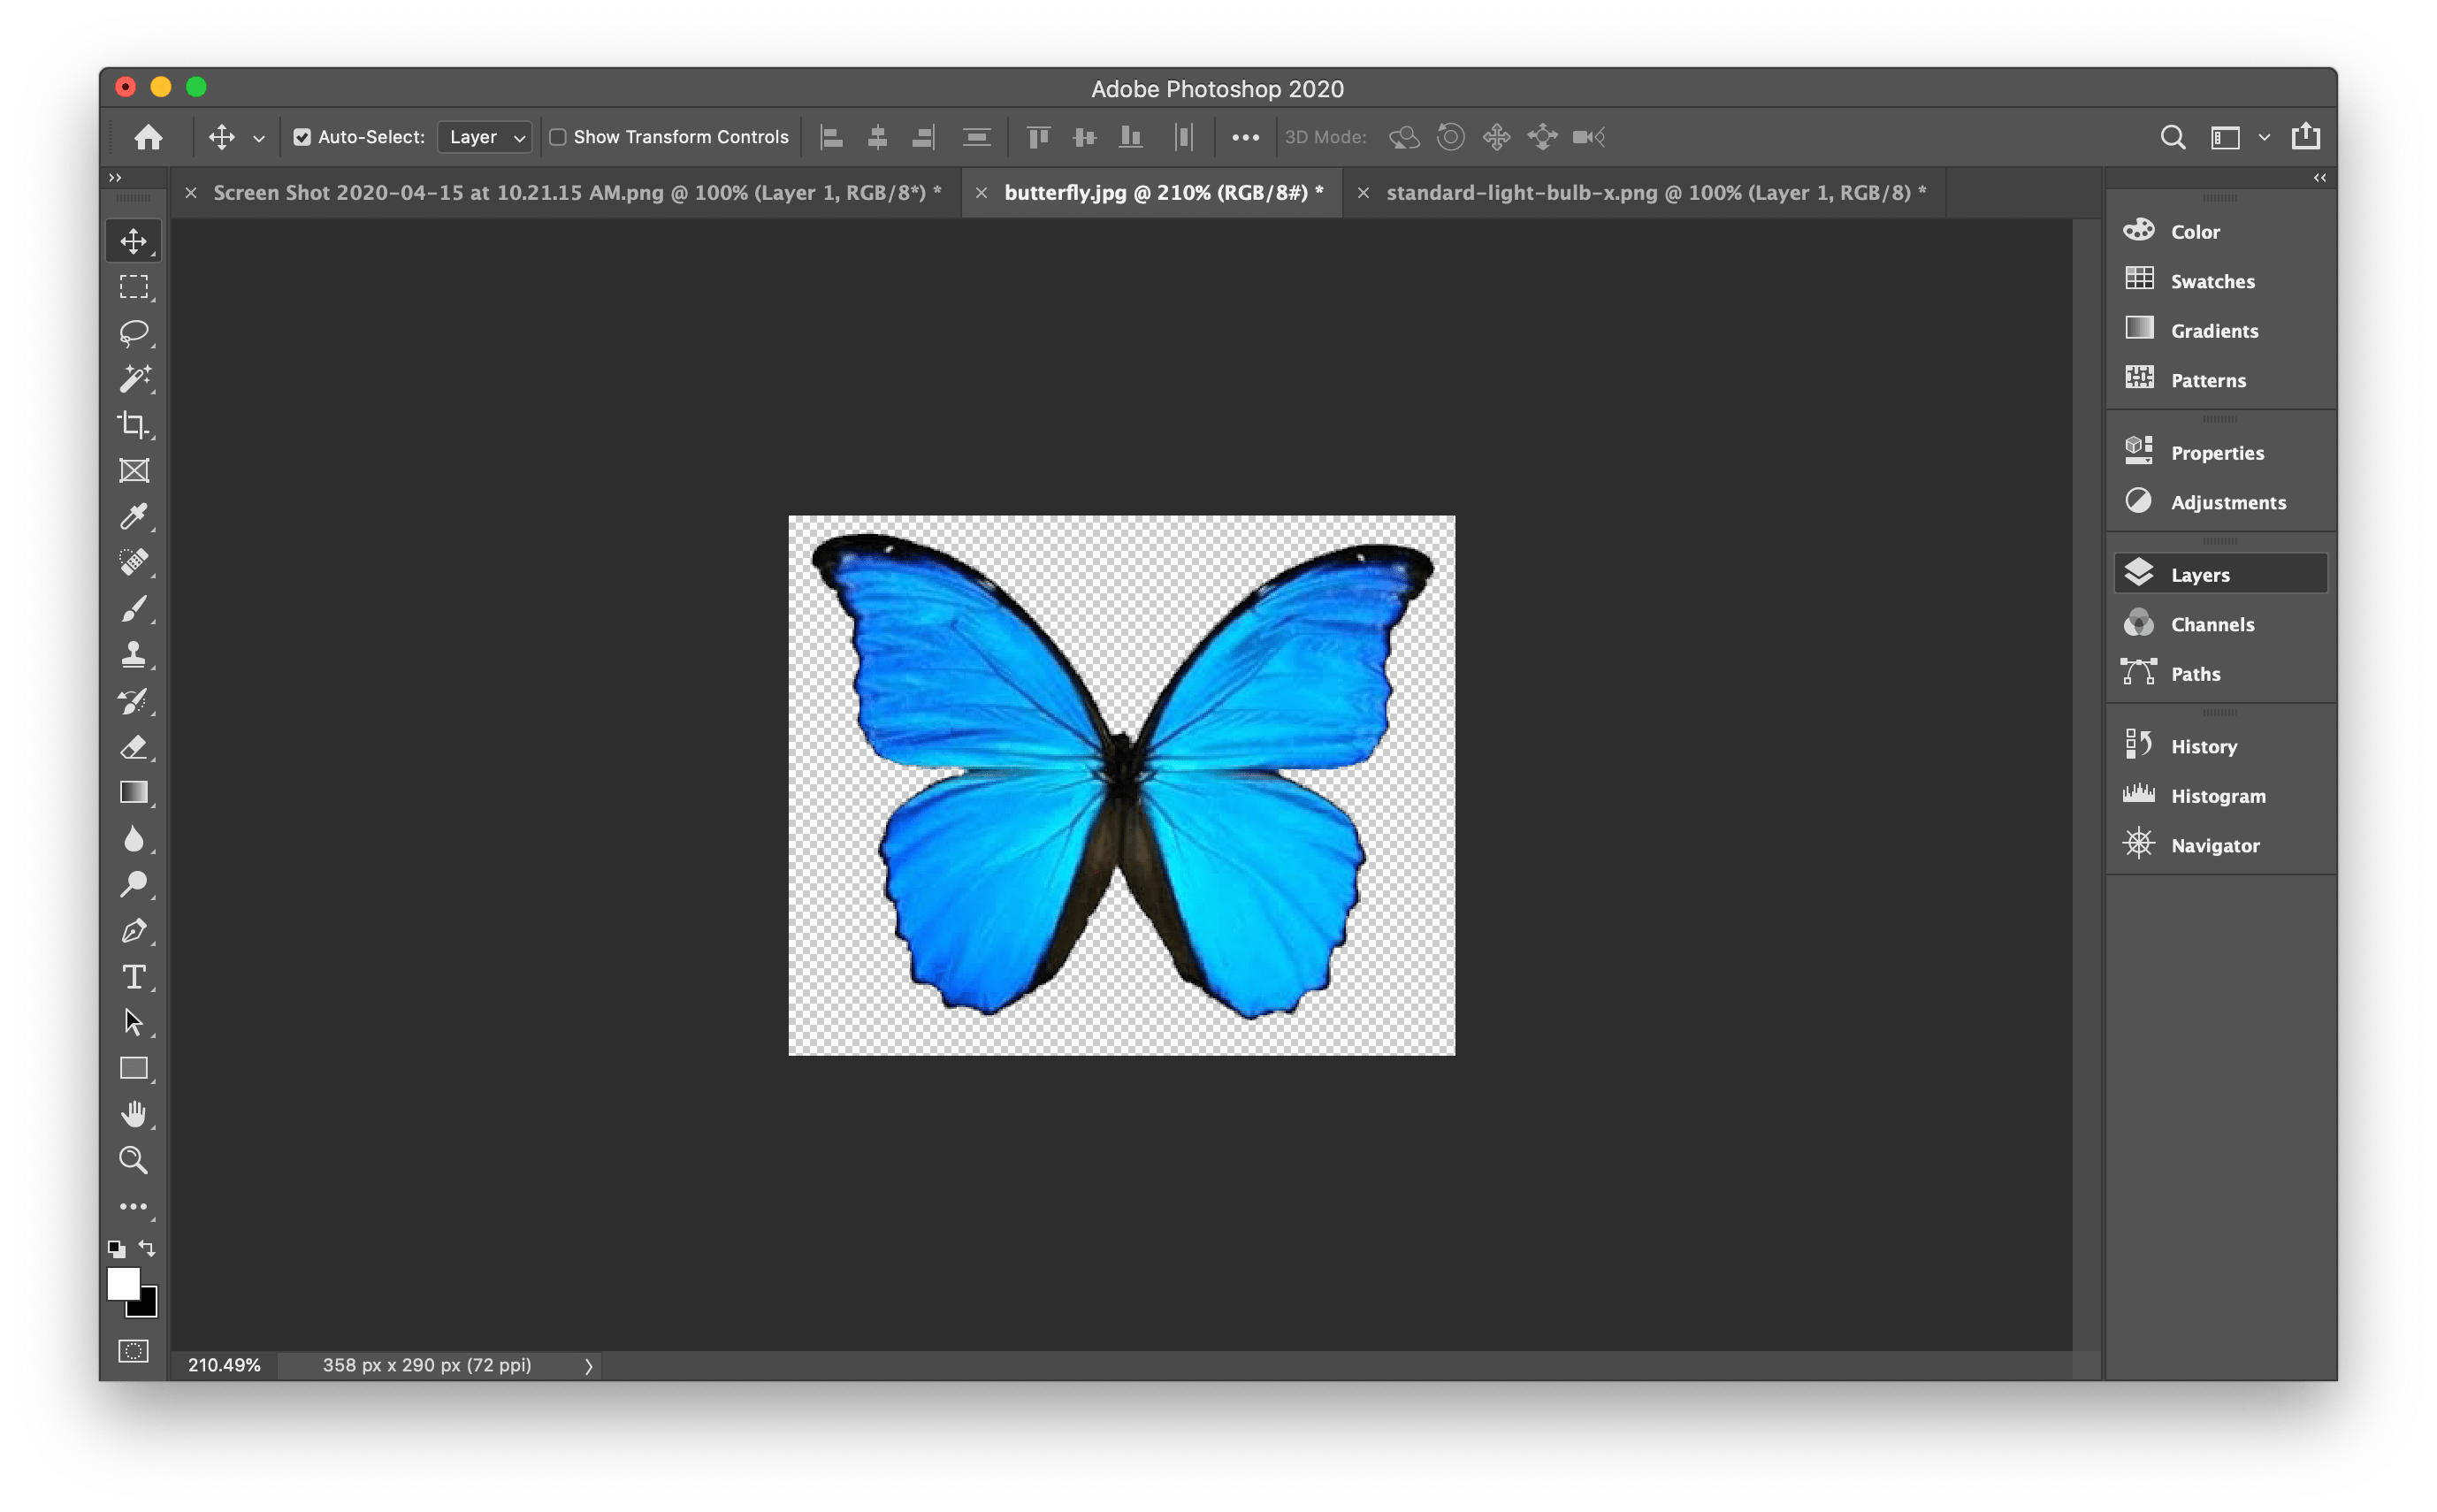
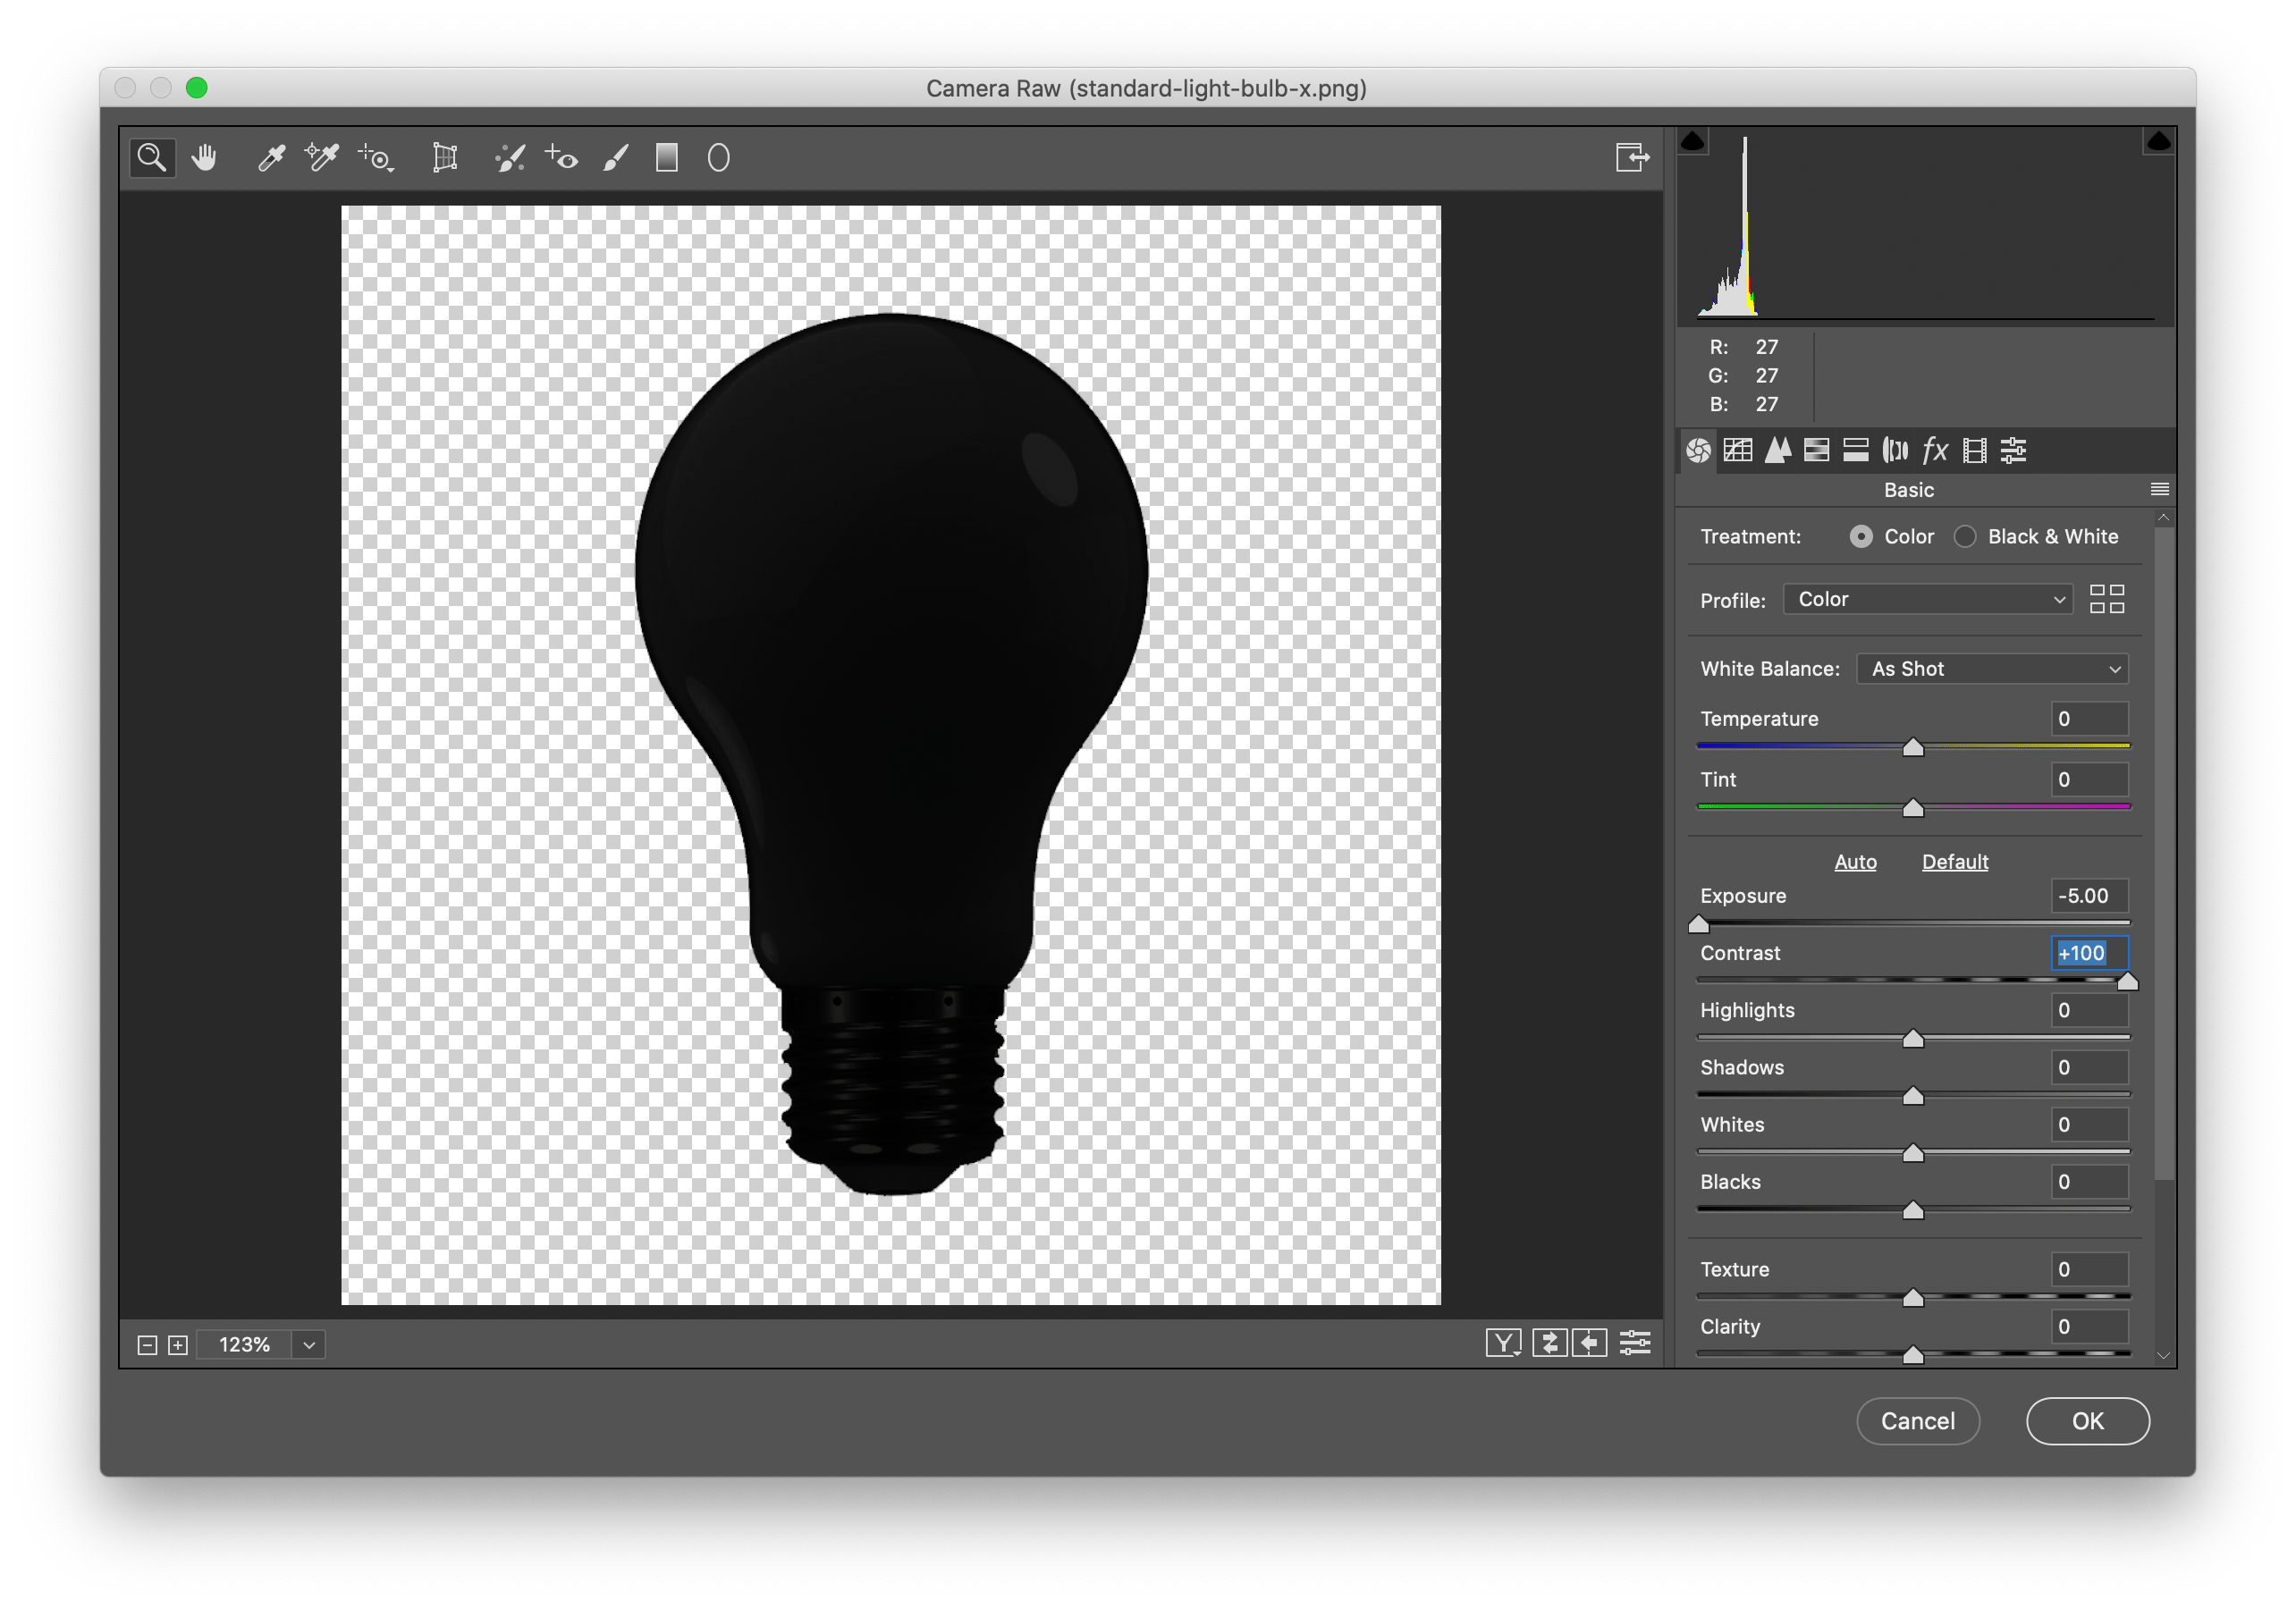
I then use the Camera Raw Filter in Photoshop, turn the exposure all the way down and contrast all the way up to quickly turn the image into a silhouette.
2. Converting to Vectors
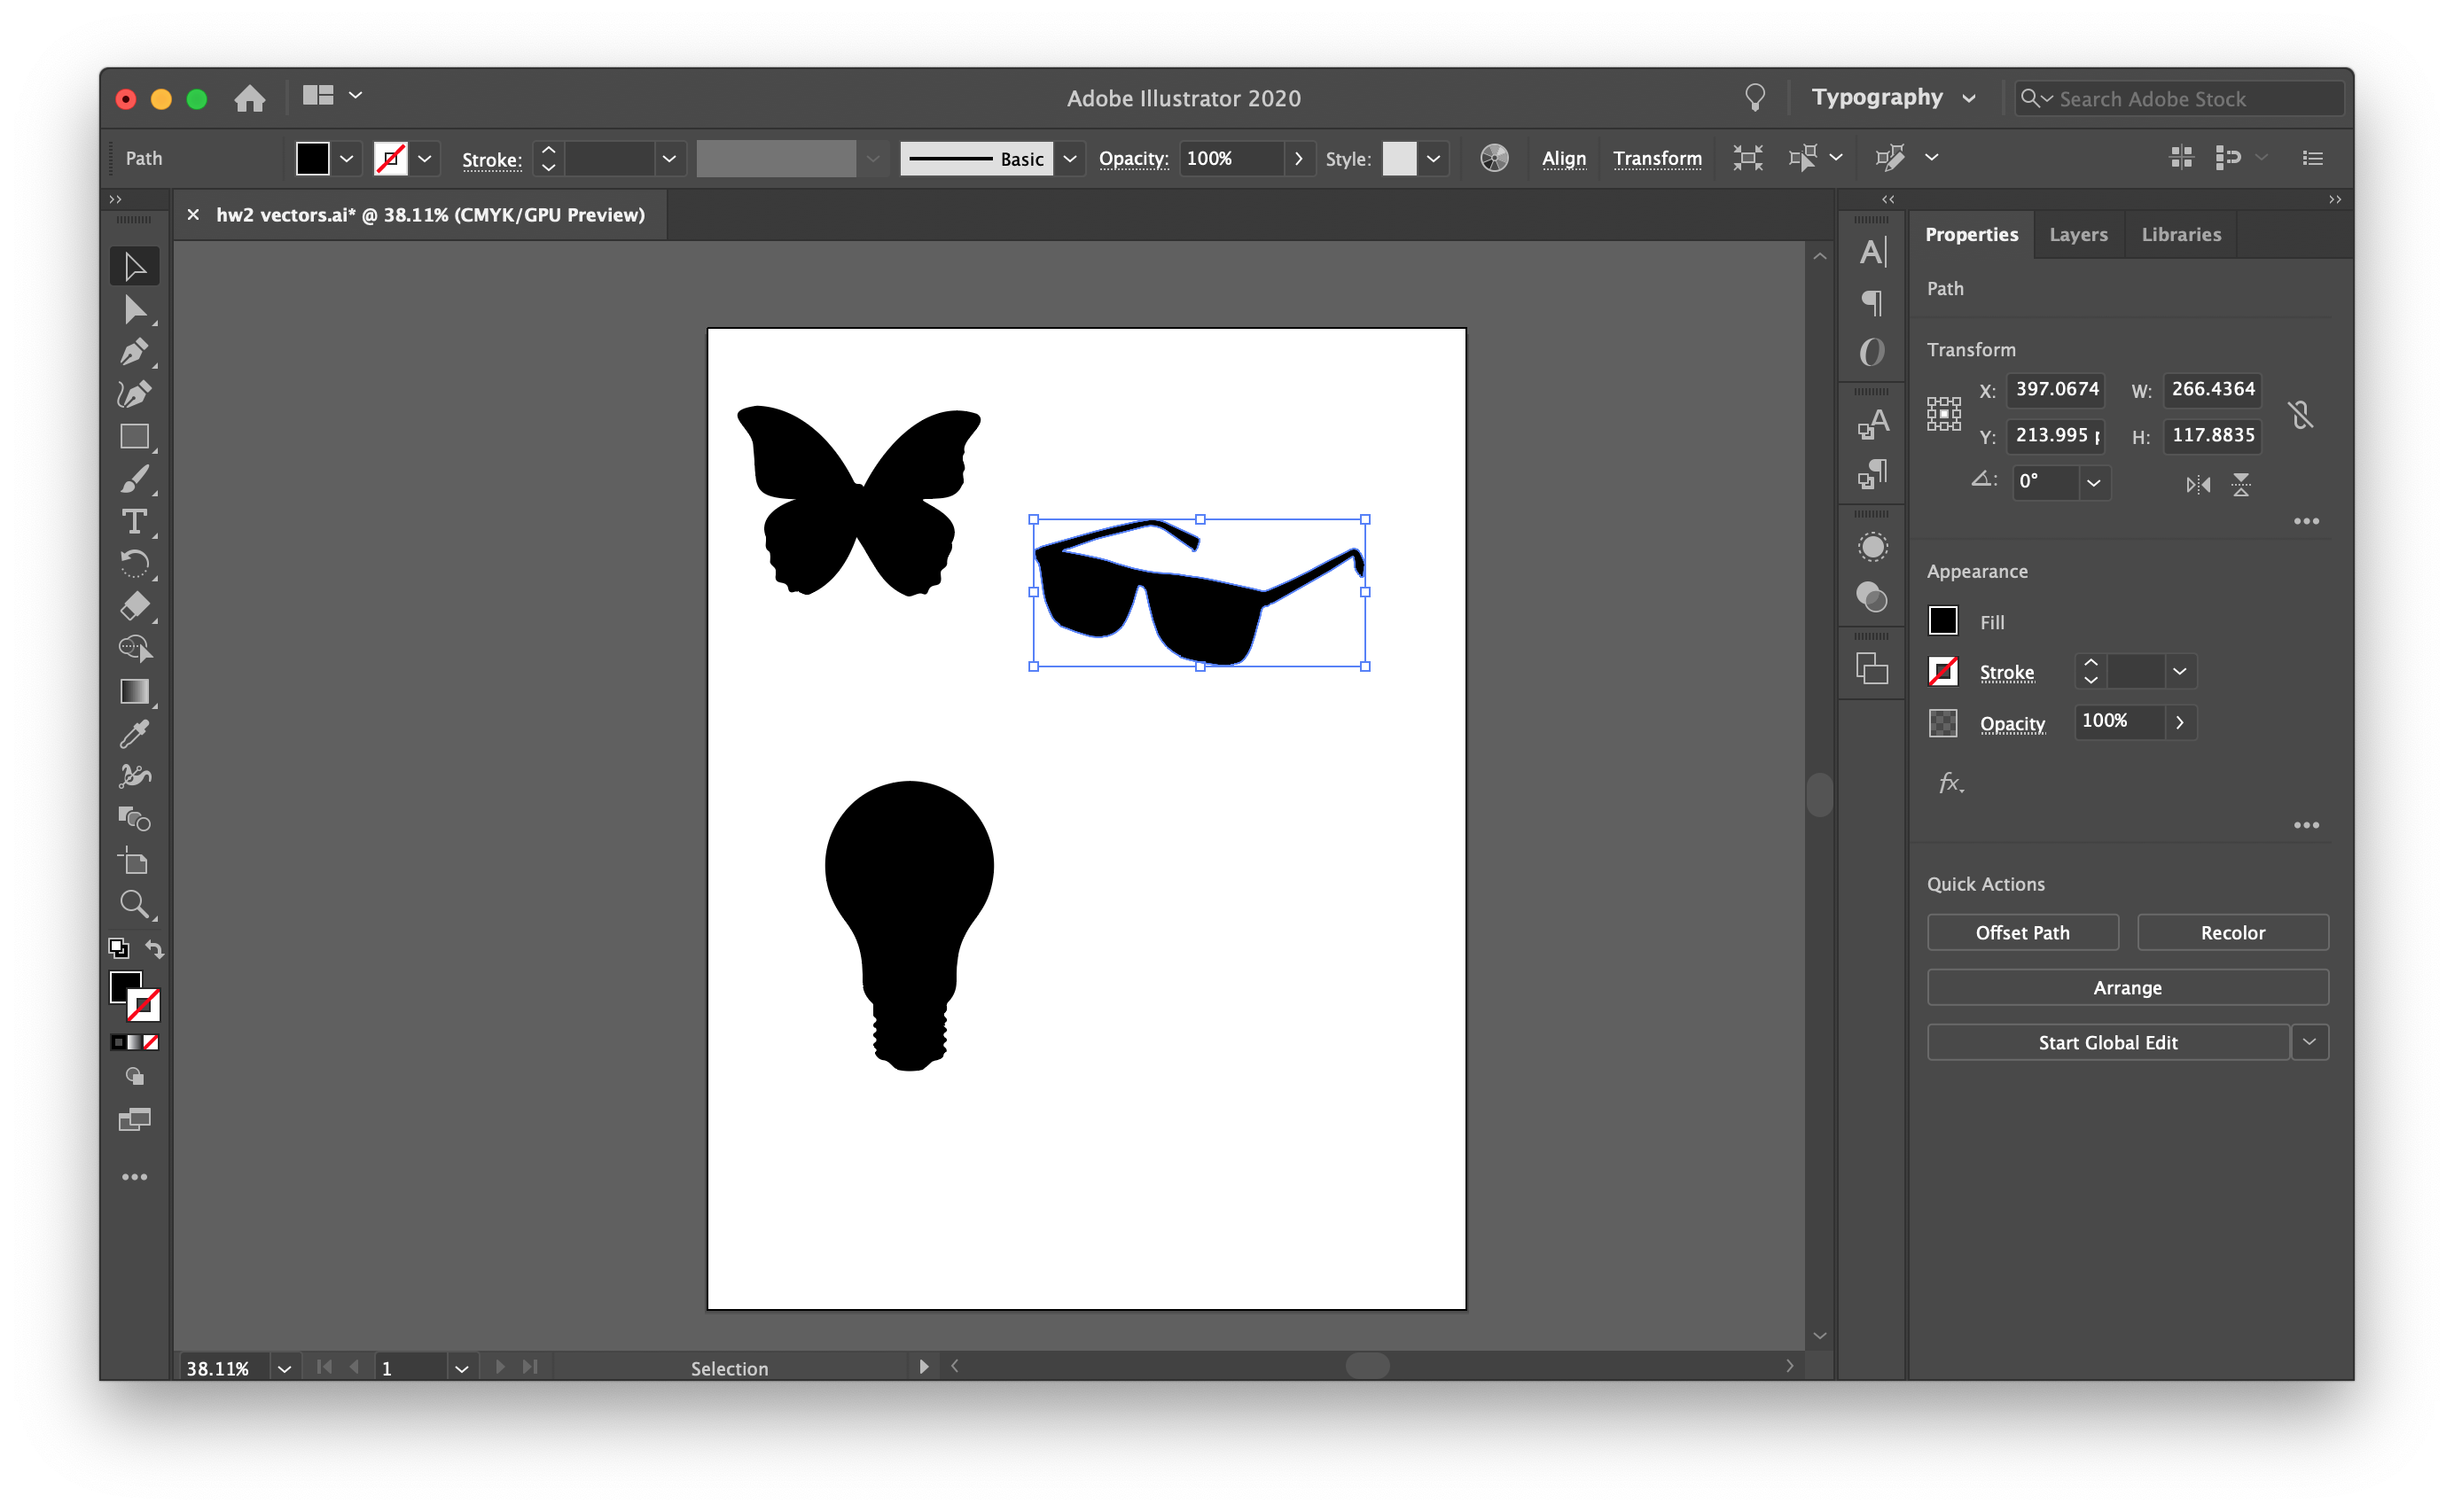
With the silhouettes completed, I then paste the images into Illustrator and use the Image Trace tool to convert them into vectors. I then save the entire artboard as a .dxf file
3. Moving to Rhino
Once I have all the vectors completed, I then started a new project in Rhino and import all the .dxf files. I then added an offset of 0.2 inches to each of the shapes and extruded them by 1 inch.
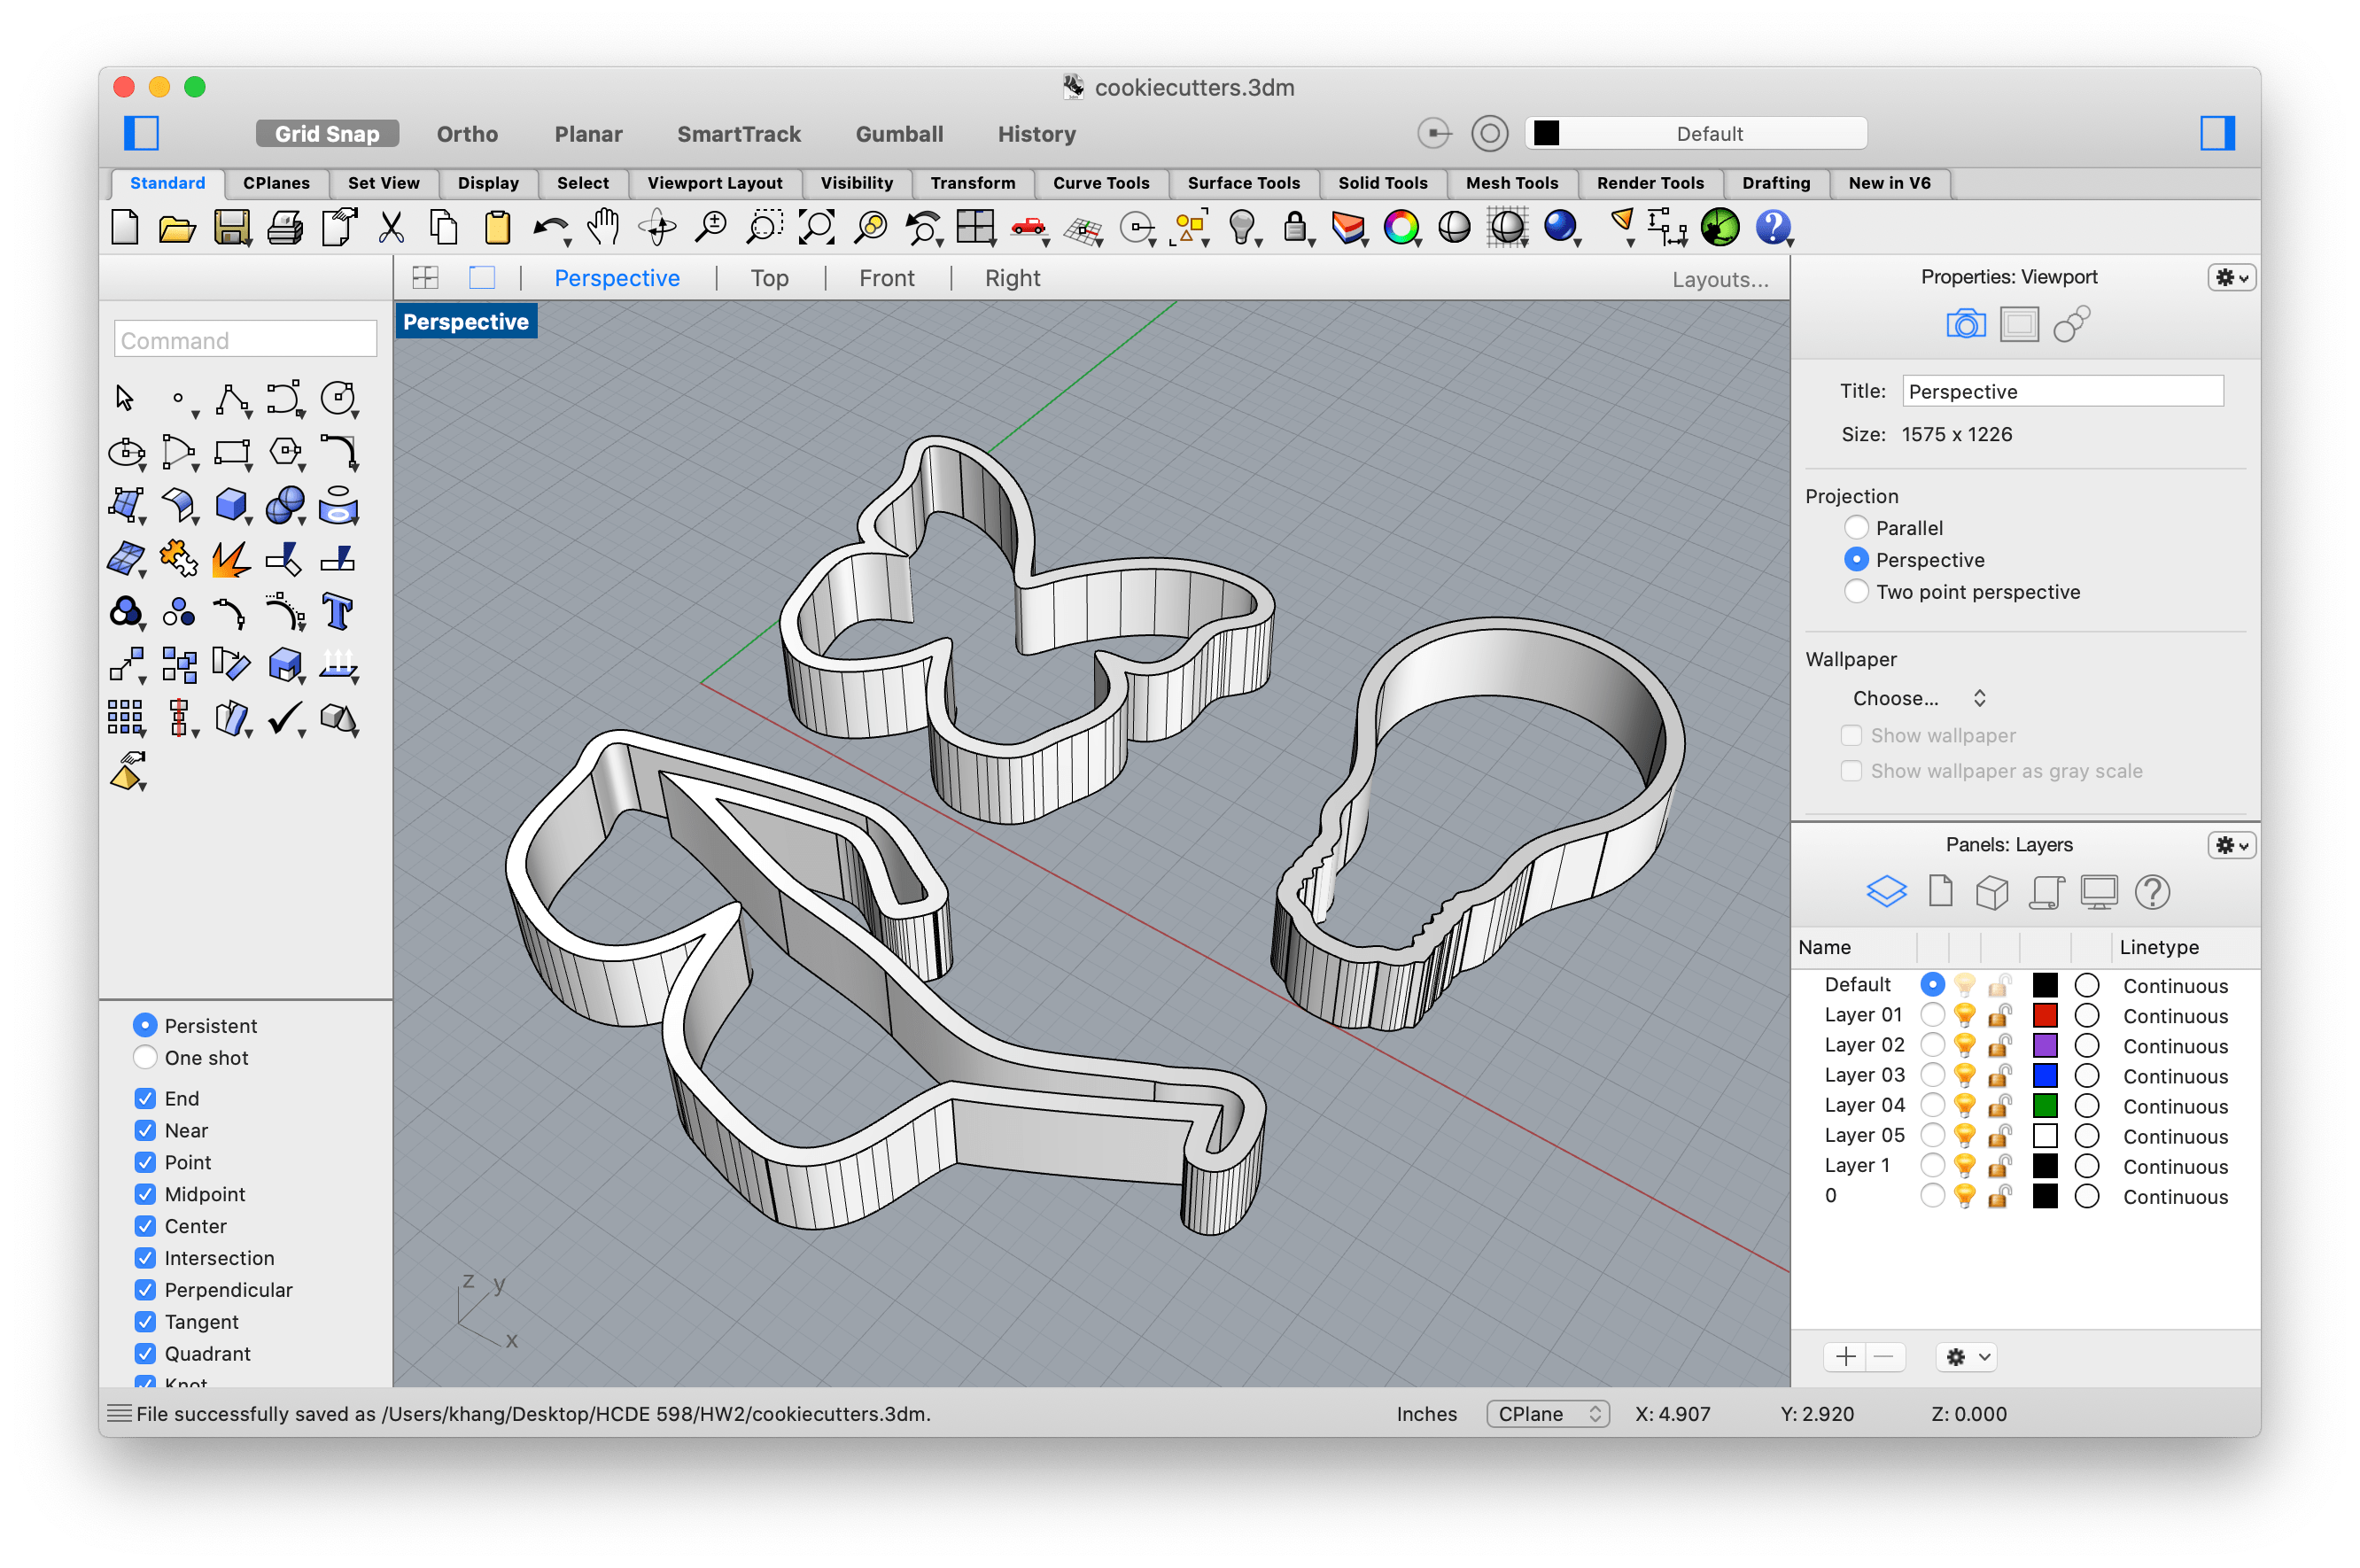
I then added outer layer with an extrusion of 0.5 inches just to make it more grip-able and complex. I also realized that I needed to use the BooleanUnion command merge both extrusions into a single closed solid polysurface.
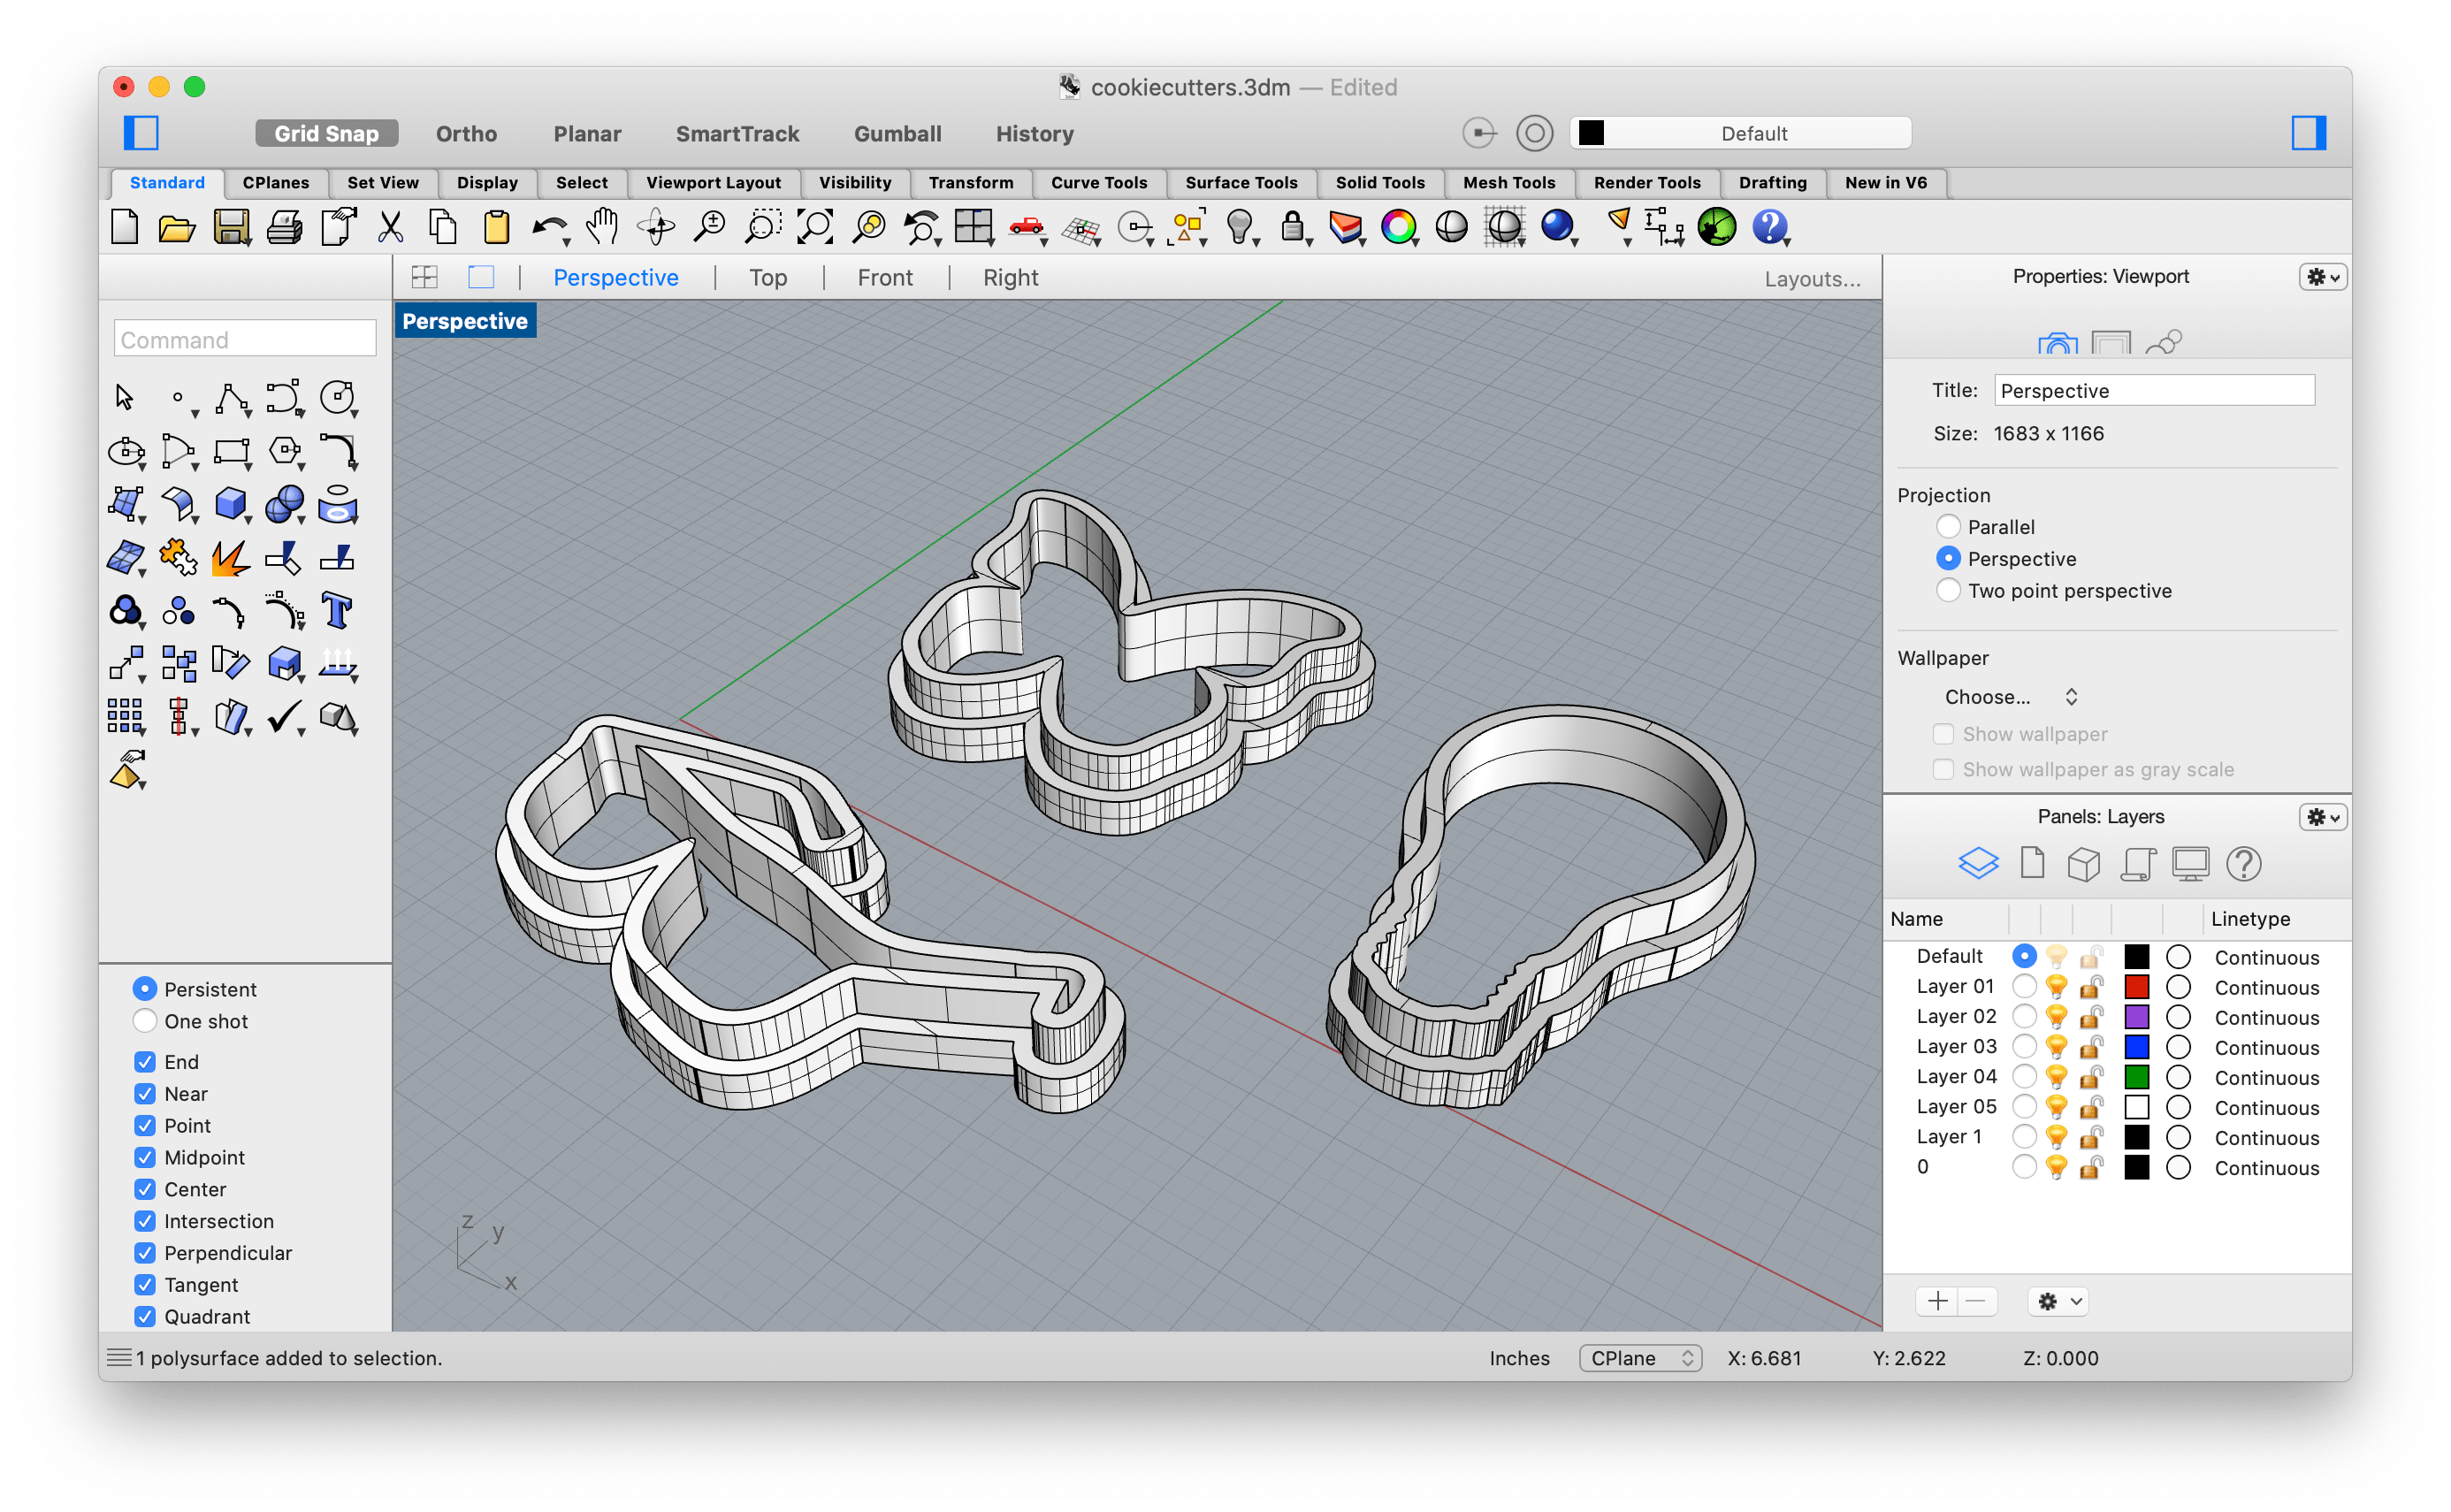
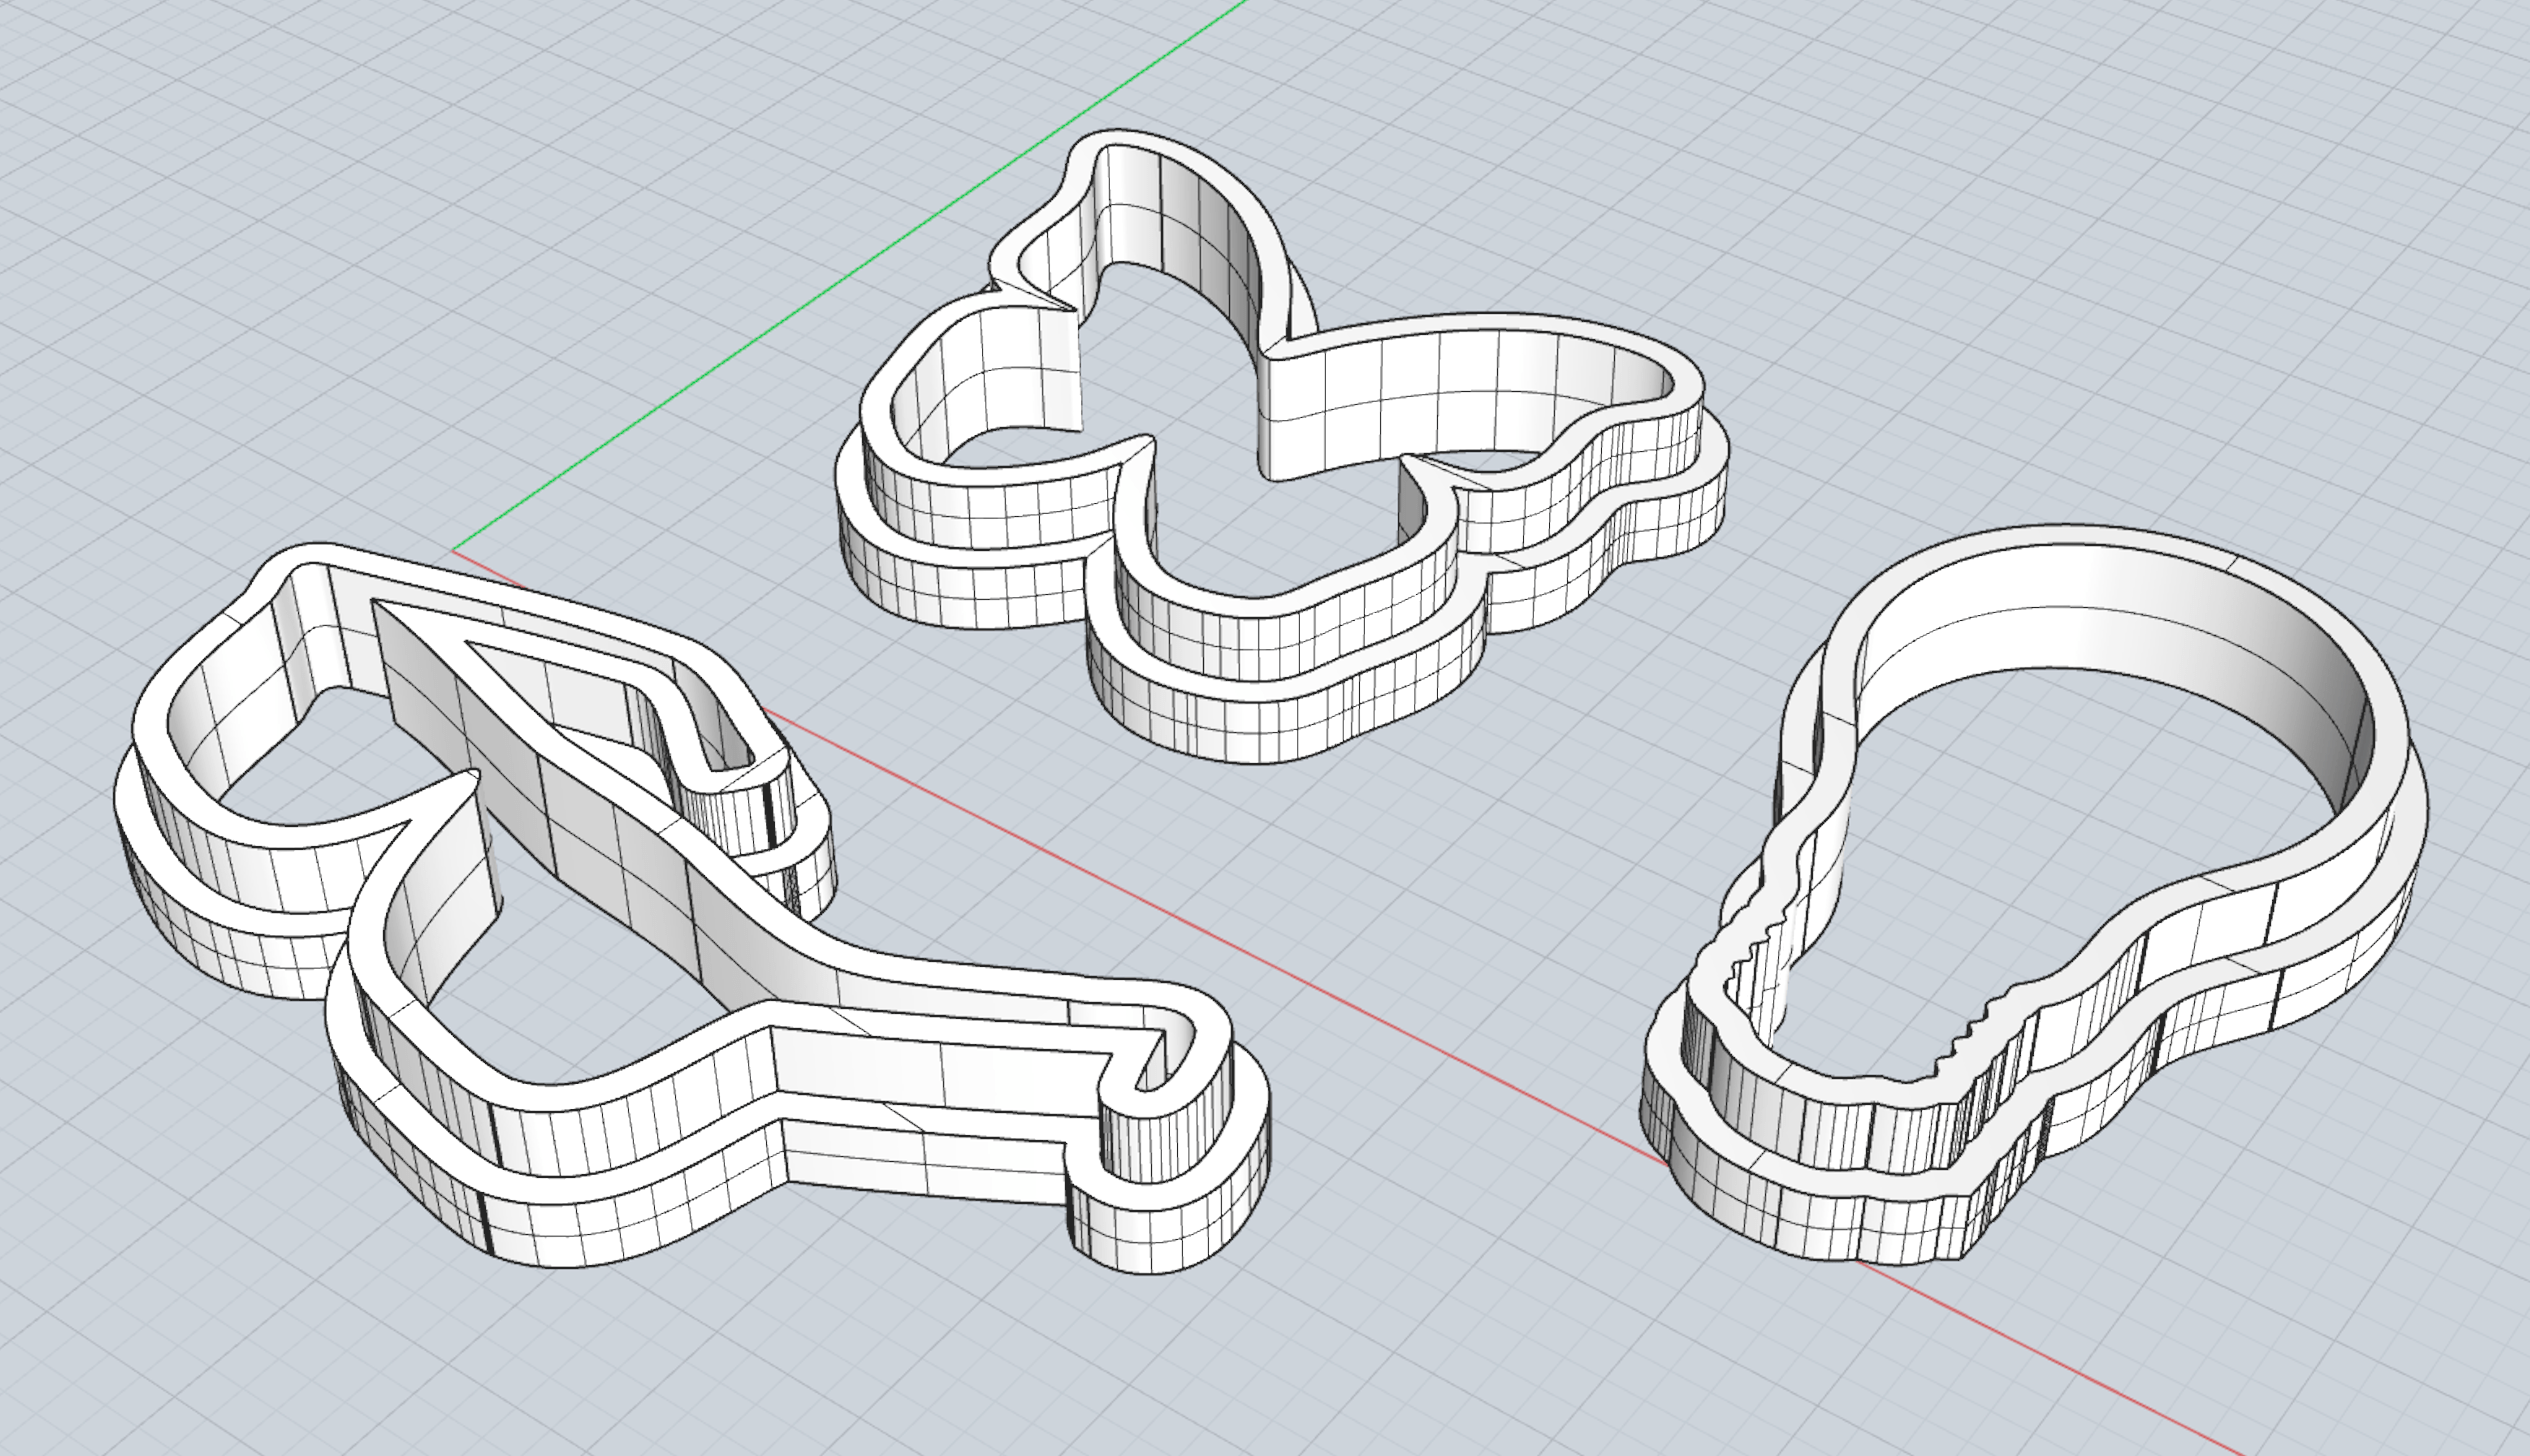
These are then exported as .stl files as shown below.
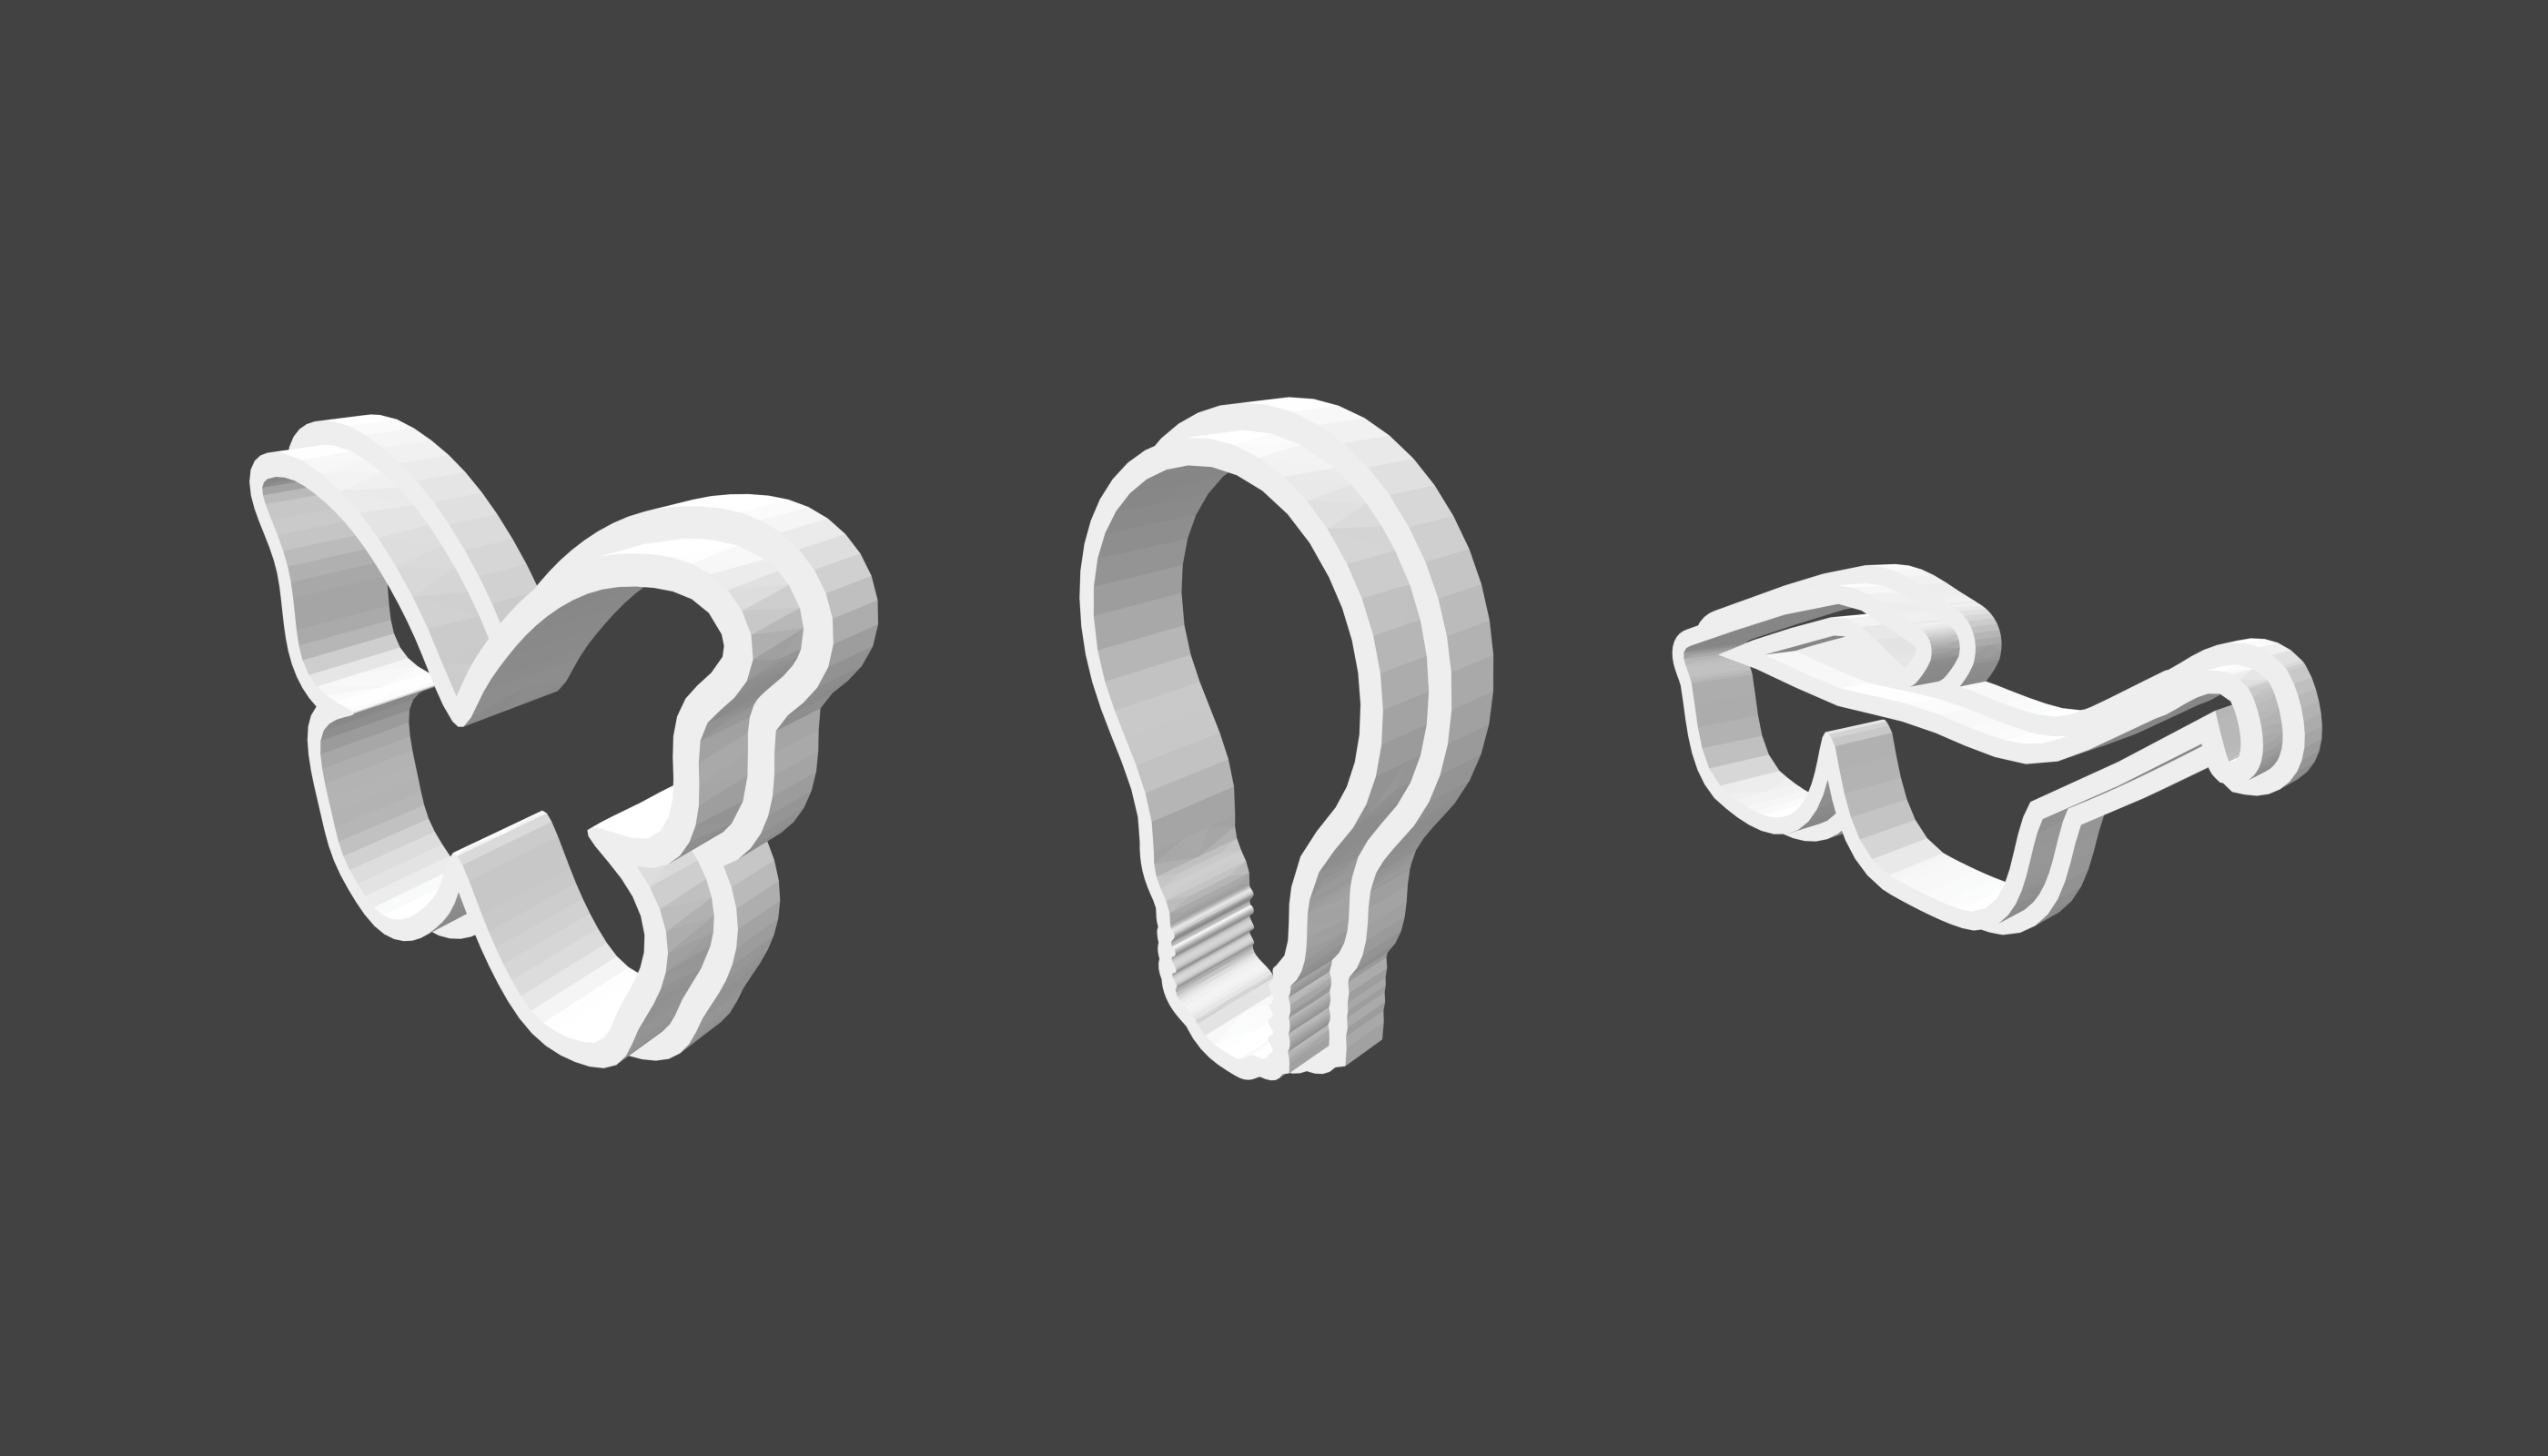
You can access the .stl files on my github repo.